

Upload Attachments
Last updated
Introduction to Attachments
The Import Data section provides you with various functions for data management, including the ability to upload attachments either to a job or to an inventory item. This can be useful if you wish to attach documentation, pictures of the client site, scanned receipts, or other information that can help you stay organized.
To get started, navigate to the Import Data section from the dashboard:
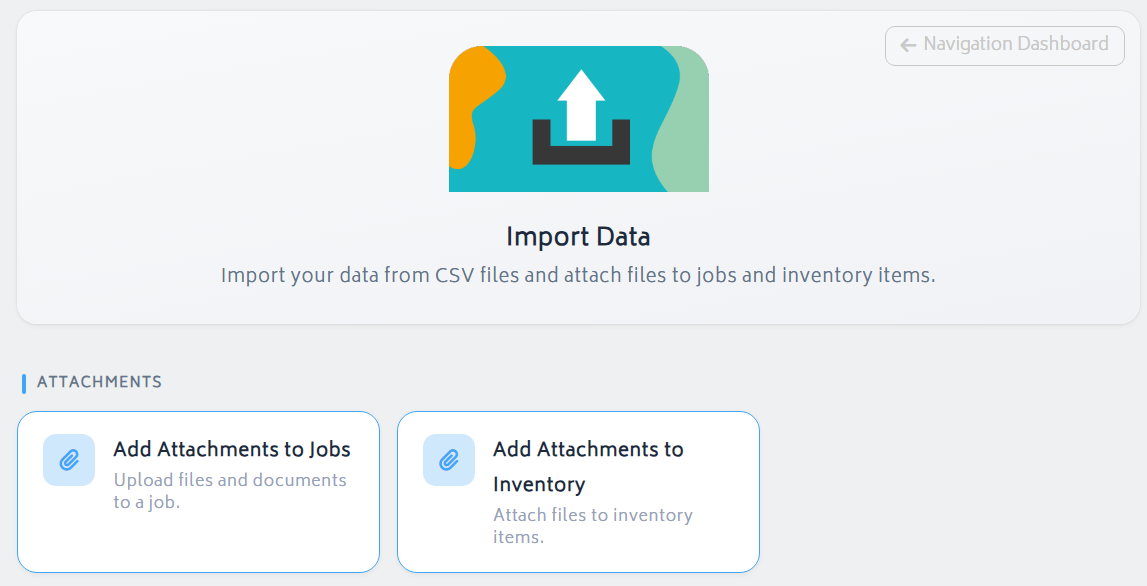
You will be directed to select one of the below options:
- Add Attachments to Jobs
- Add Attachments to Inventory
Add an Attachment to a Job
To add an attachment to a Job:
- Click “Add Attachments to Jobs”
- You will be asked to select which job to upload the attachment to:
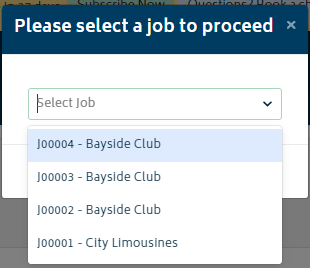
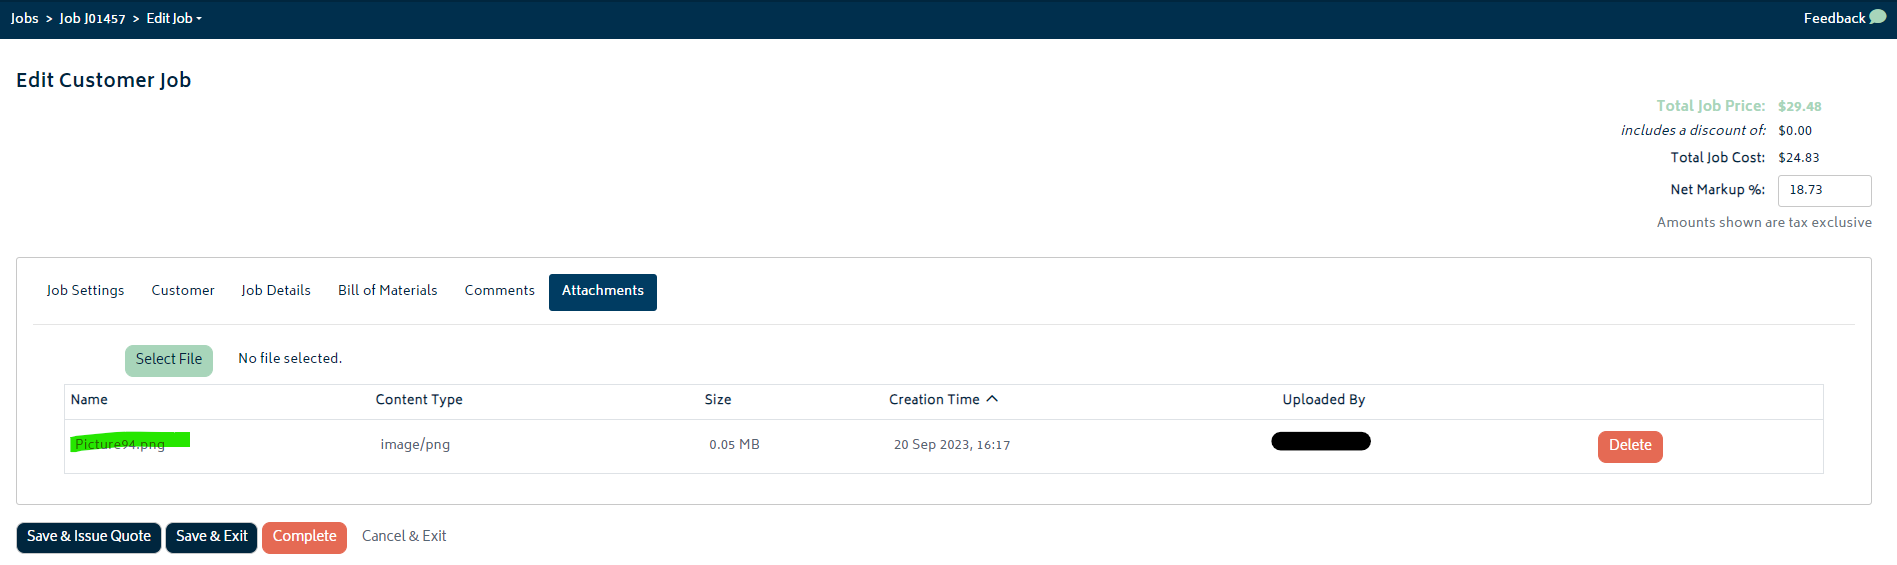
- Once you make your selection and click Proceed, you will be redirected to the Attachment section of the job edit page:
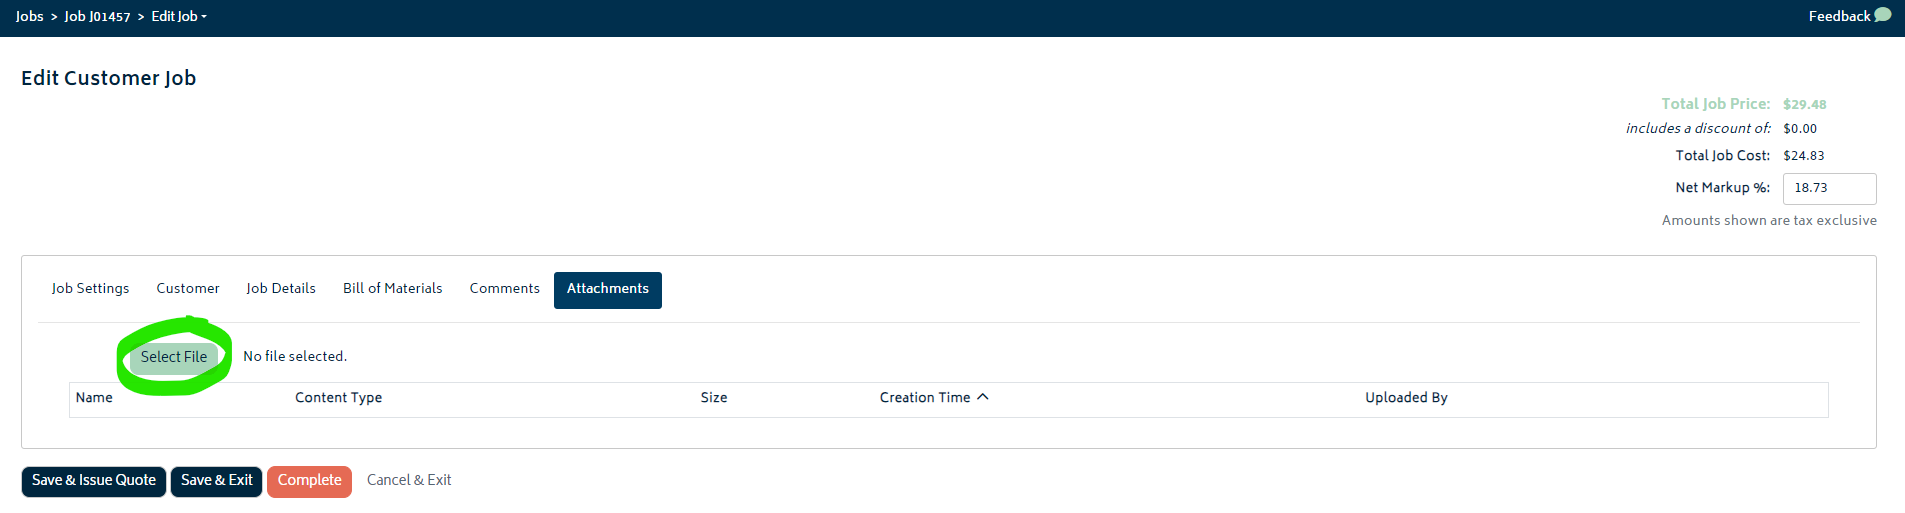
- Click the Select File button, and choose the attachment you'd like to associate with the job from your file browser.
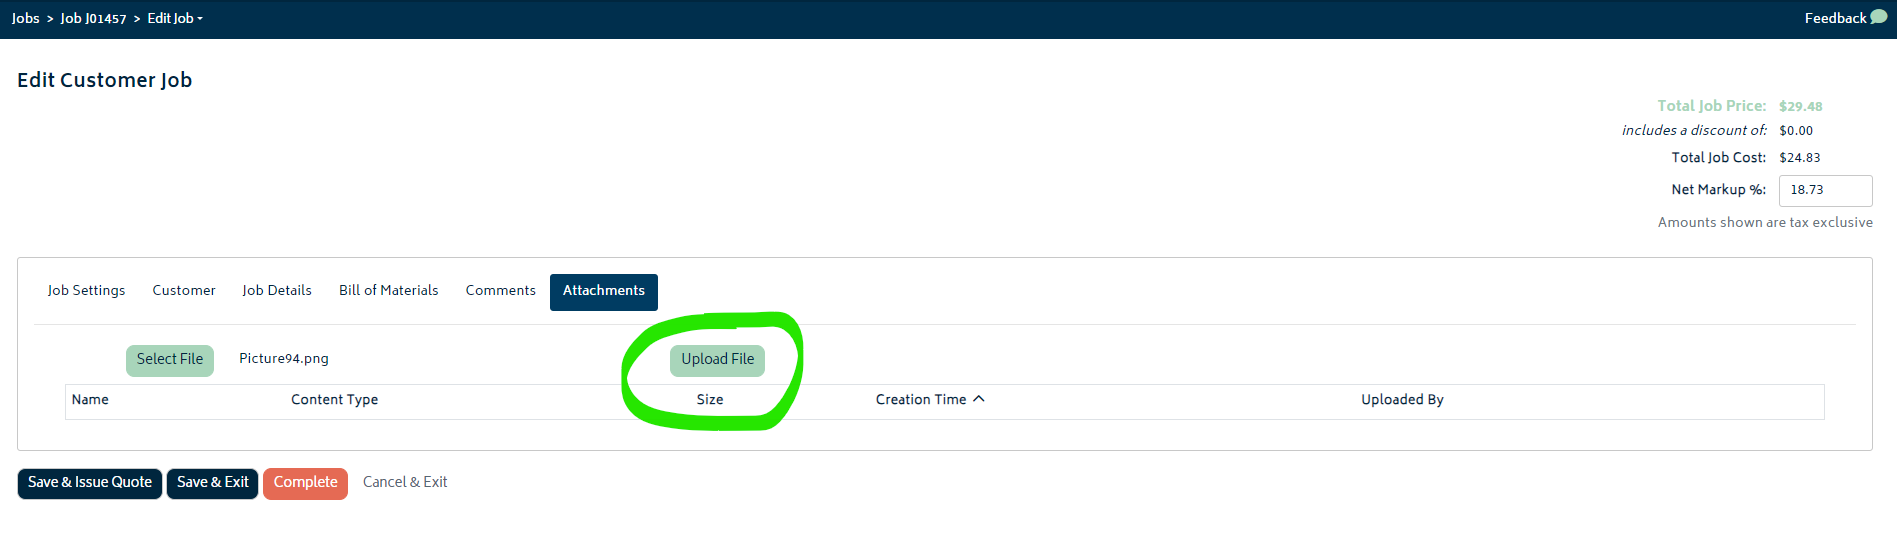
- Once you've selected a file, click on the Upload File button. The file will be shown in the list:
Add Attachment to Inventory
The process to add an attachment to an inventory item is much the same as adding an attachment to a job:
- Click “Add Attachments to Inventory”
- You will be asked to select which item to upload the attachment to:
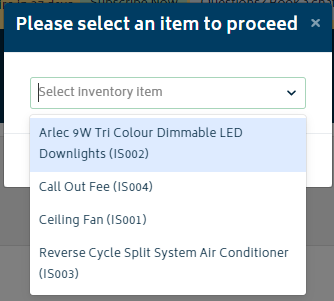
- Once the item is selected and you click Proceed, you will be redirected to the inventory tab of the item page:

- Follow the same process as detailed in the job attachments section above to select and upload your attachment.
- Once complete, your attachment will be shown in the list.
Size Limitations
For both jobs and inventory, the maximum filesize for uploads is presently 100Mb.
Next: Back to Knowledge Base.