

Add and Edit Contacts
Adding a New Contact
To add new customers, you can add them either into Xero or into Gojee:
-
For bulk contact imports, it's best to do this with the Xero import functionality.
- Xero's import functionality allows you to import up to 1000 line items at once. If you have more contacts than this, you will need to perform multiple imports.
-
For one off additions or modifications, it's easiest to do these directly in Gojee.
- The Contacts page allows for the creation of new contacts as either customer or supplier.
- Customer information newly registered from a job will be able to create a new customer contact or update an existing one.
Adding a new Customer or Supplier
You can either navigate to the contact list by clicking Resources > Contacts from the top menu or clicking on “Contacts" from the Navigation Dashboard.
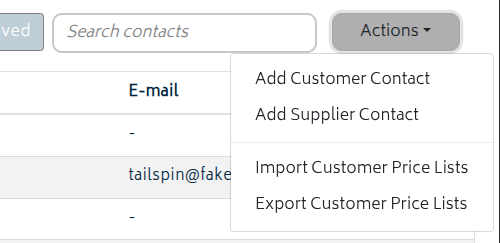
For the Contacts List, the Actions button is on the top-right. Clicking it will allow you to add either a customer or supplier as a contact, as well as perform other actions.
From the Navigation Dashboard, after clicking on the Contacts tile, you can add a customer contact by clicking Add New Customer or a supplier contact by clicking Add New Supplier.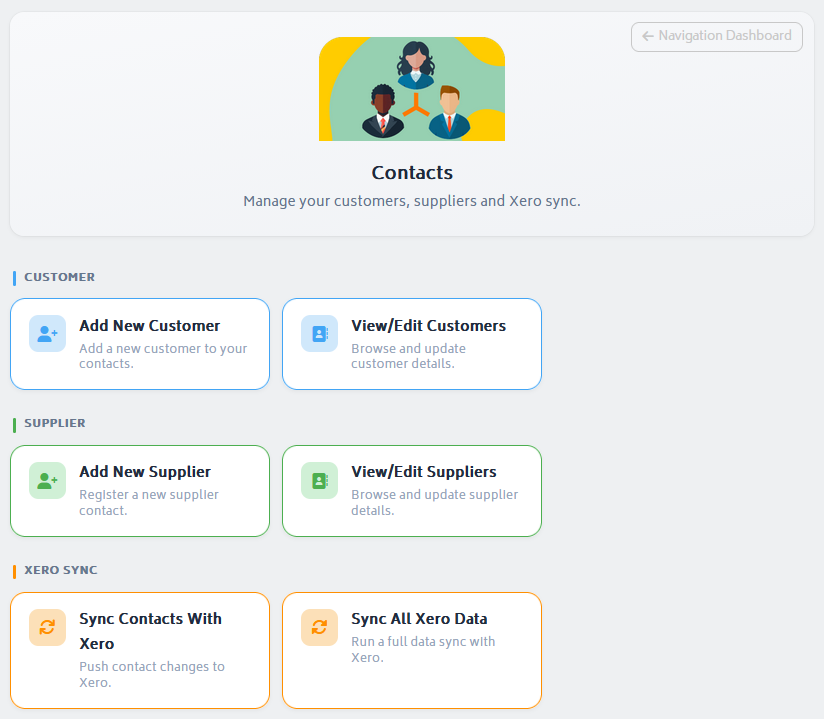
In either case, you will go to the contact creation page. Whether you are creating a customer or a supplier, the basic information you need to fill in will be much the same.
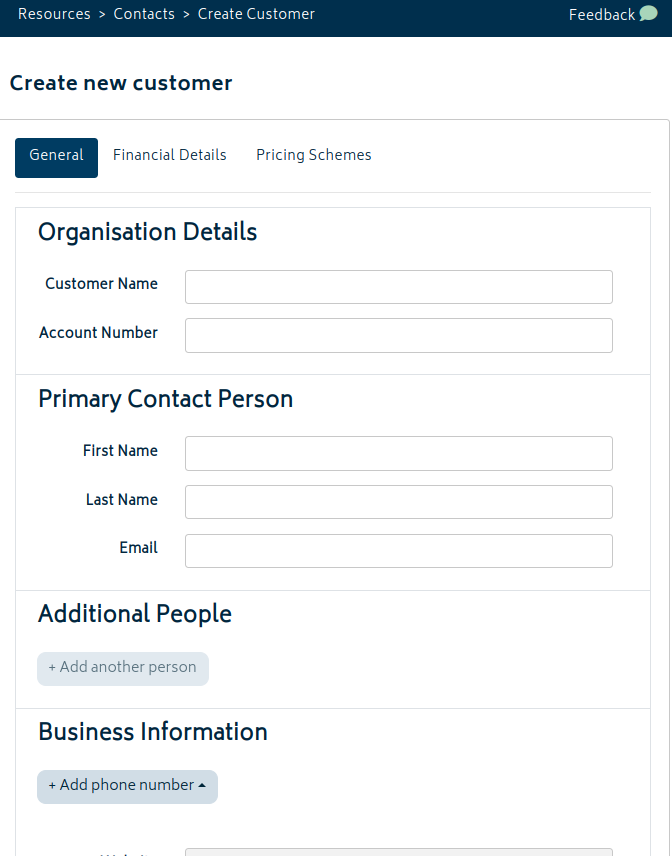
Enter the information and click “Create” and a new contact will be created in Gojee and sent to Xero.
Note: The only requirement to create a contact in Gojee is the name. However, we recommend entering as much information as possible. Without an associated email, you will not be able to directly email quotes, purchase orders, or invoices to the contact from within Gojee. For suppliers, entering their information in advance will save time when raising purchase orders.
Editing a Contact
Once you have created a contact, you can click any contact on the list to edit it:
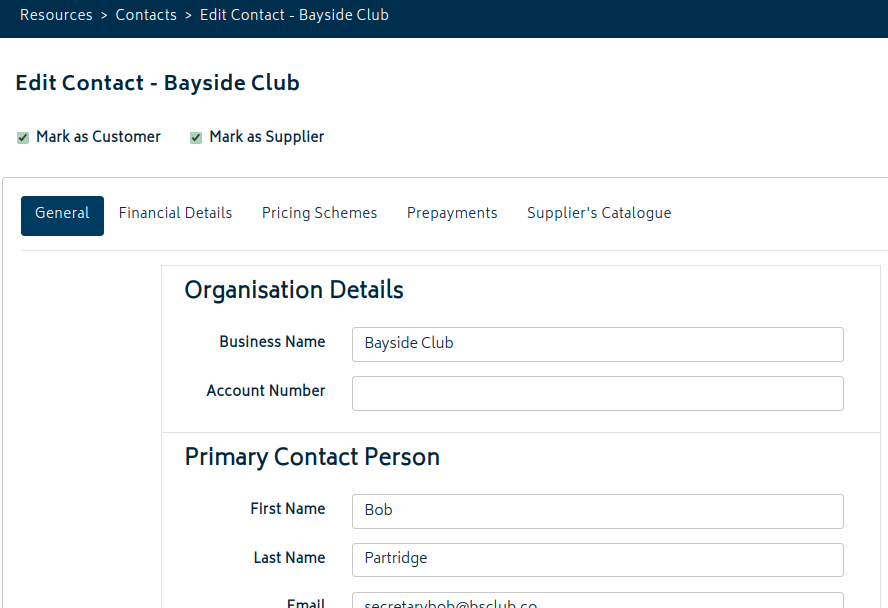
You can use the checkboxes to change whether the contact is a customer, supplier, both, or neither.
There will be different tabs to manage contact information available once a contact has been created:
- General: Contact information, address, etc.
- Financial Details: If the Multi-Currency add-on is enabled, this tab will allow you to select or update the contact's currency.
- If the currency you need for the contact is not visible, please set that currency to a contact in Xero first and perform a full sync.
- Customer Price List (Customer only): Set up customer-wide and item-specific pricing rules for repeat customers.
- Prepayments (Customer only): View money a customer has committed towards completion of jobs.
- Supplier's Catalogue (Supplier only): View and import lists of items that can be purchased form a supplier.
These tabs are detailed below.
Universal Tabs
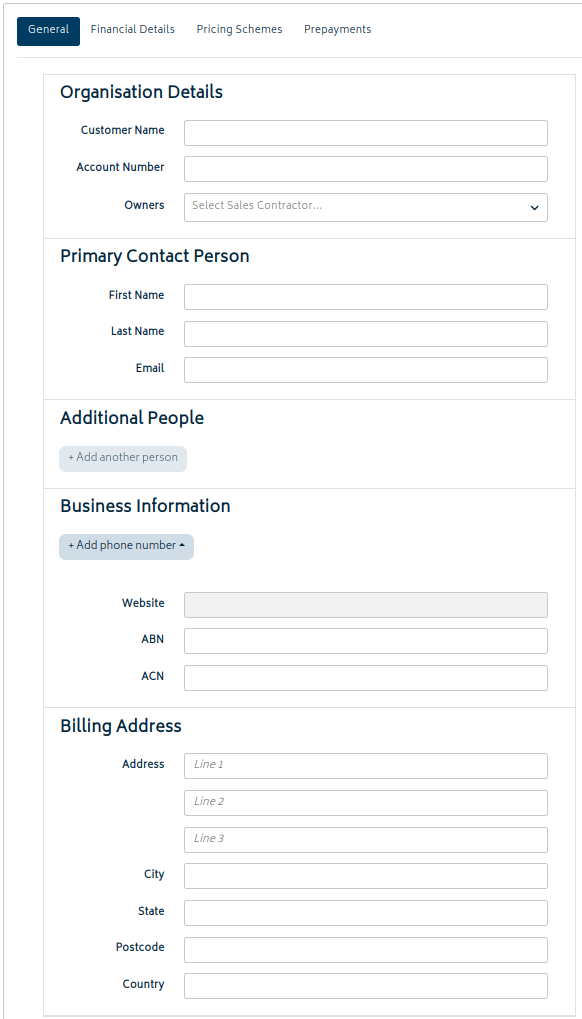
The General tab contains all the fields available when initially setting up the contact. Additional people can be added to the contact as required, and each can be set up with an email. Up to four phone numbers can be registered to a business, as these are set up to sync with Xero.
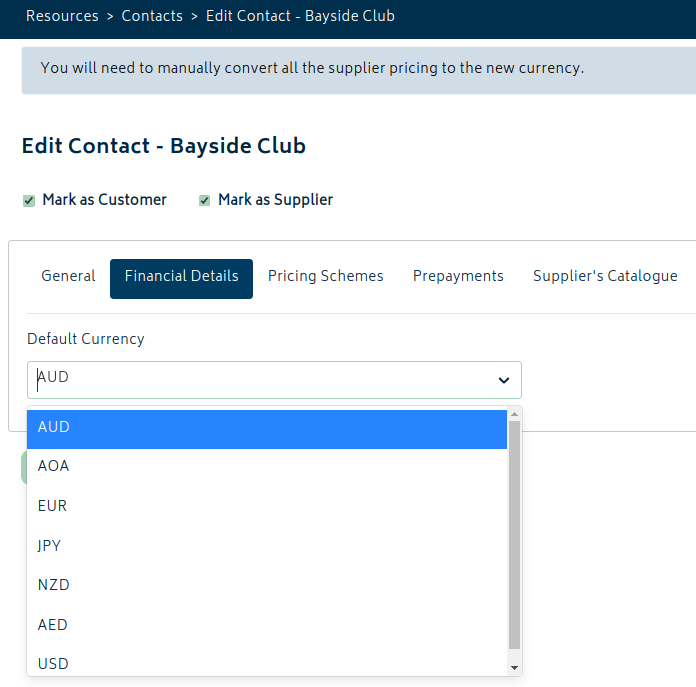
The Financial Details tab will allow you to select the contact's currency. The list of available currencies is pulled from existing currencies for contacts from Xero. If you don't see the currency you need, you will need to set it manually in Xero and sync the contacts into Gojee. If you don't see this tab but wish to have access to it, you will need to enable Multi-Currency from Organisation Setup > Organisation Add-ons.
Customer Tabs
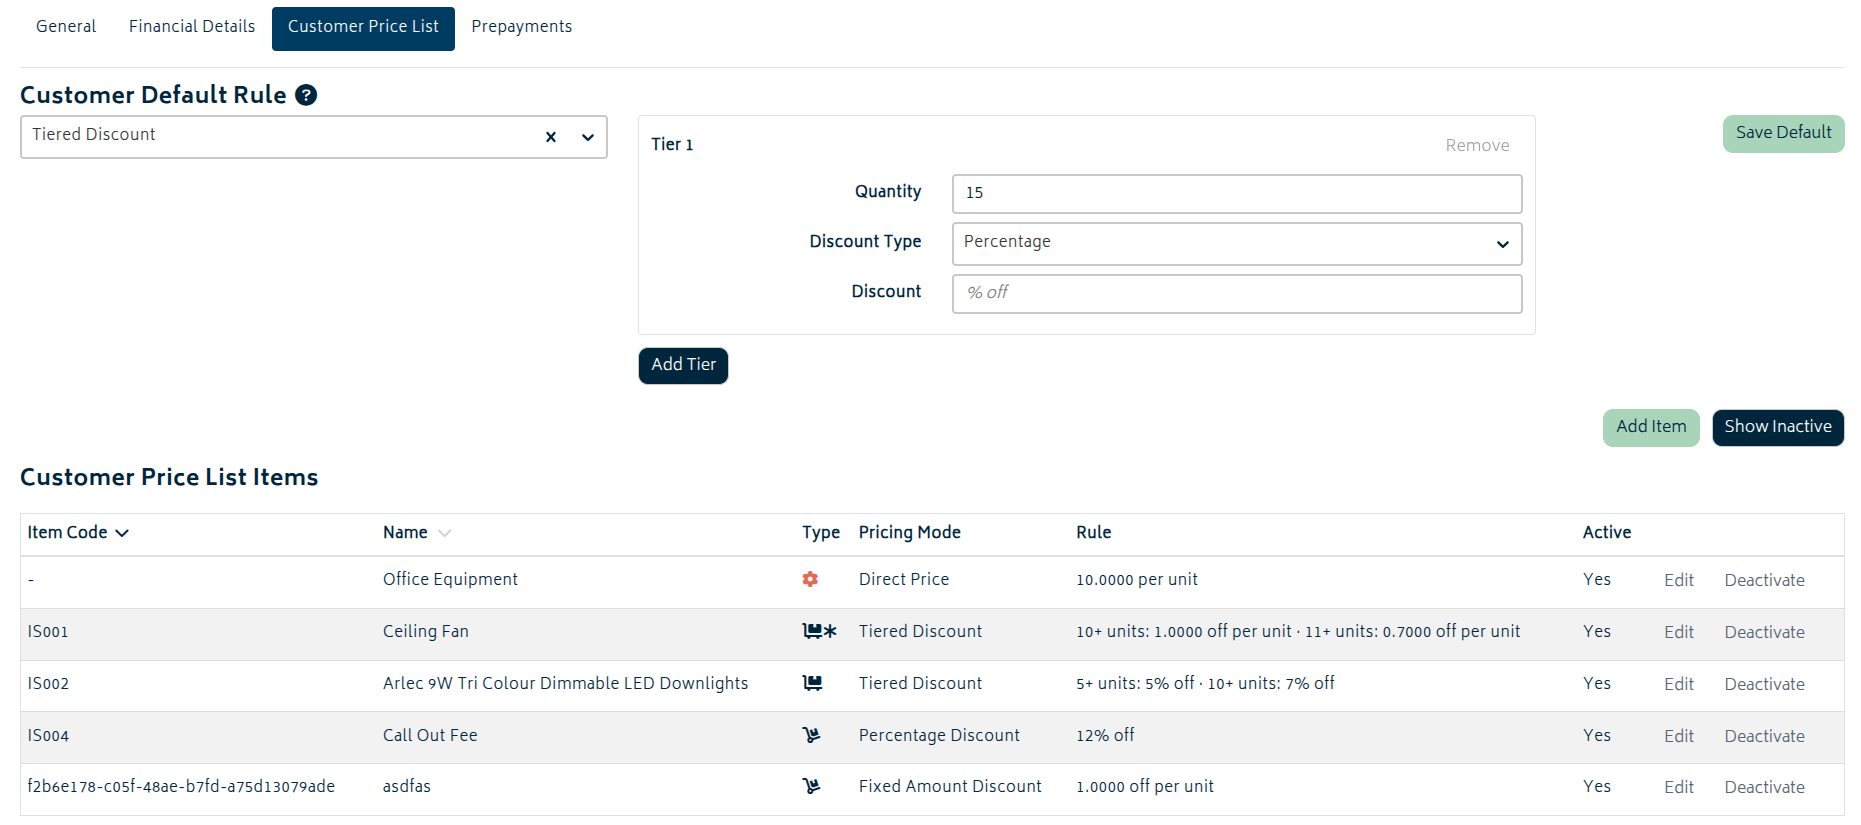
The Customer Price List tab allows you to save a customer default rule and item-specific pricing rules for selected SKUs. To learn more, read the Customer Price List article.
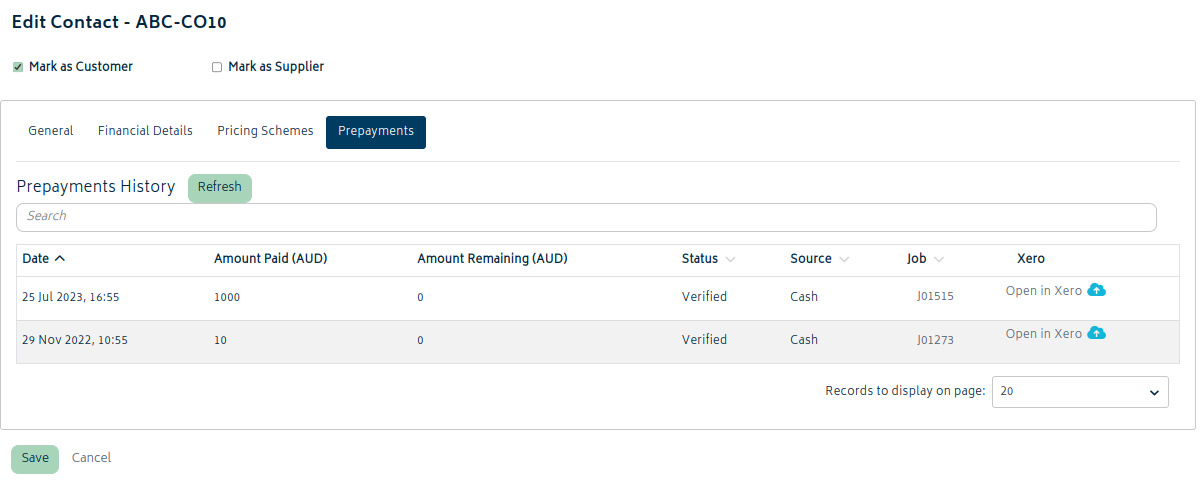
The Prepayments tab will detail all jobs that prepayments exist for. You will be able to click on the link to Xero to view the transaction in Xero, or use the job number to look up which job the prepayment was taken on.
Supplier Tabs
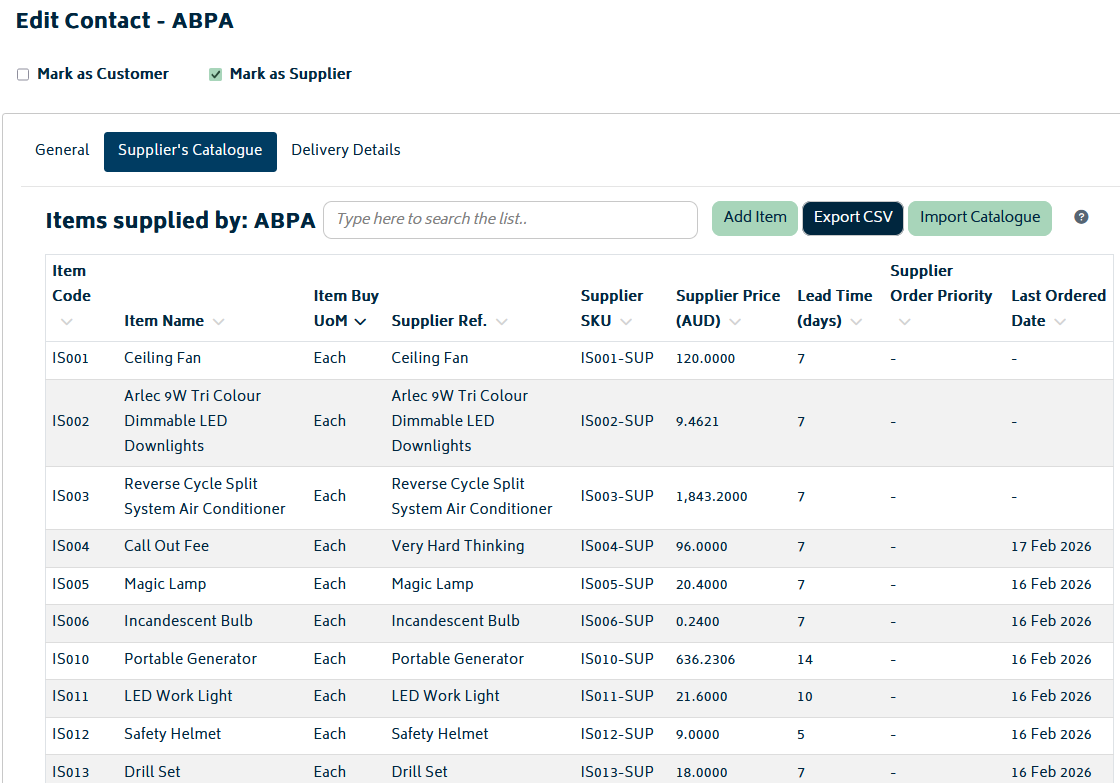
The Supplier's Catalogue tab will allow you to manage the items a supplier has available to purchase, export/import a CSV to import or update a full catalogue, and modify each of the items within the catalogue. Read the Supplier Catalogue article to learn more about supplier catalogues.
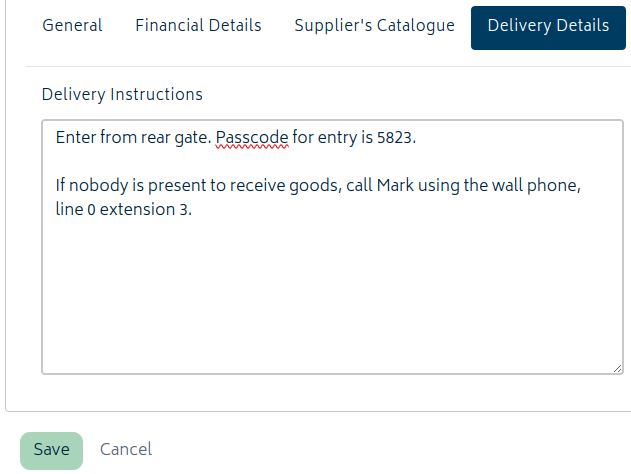
The Delivery Details tab will allow you to set specific delivery details to be included in every purchase order made to this supplier. This can be freely modified and saved for next time when making a new purchase order.
Syncing Contacts from Xero
If you've created a contact in Xero and want to pull it into Gojee, you have two options to sync - the Navigation Dashboard and the Sync Xero Now option from the My Account page.
From the Navigation Dashboard, the option to sync will be located under the Contacts header.
From the My Account page accessed from the top right menu, you can also click on the Sync Xero Now button:

Note: Users without the correct level of access will not be able to see the Sync Xero section or trigger a sync via the My Account page. If you have Xero access, it's likely that you will be set up in Gojee with the correct access. If not, a user with admin level access can process this on your behalf. Alternatively, the overnight sync will pull the contact into Gojee automatically.
From the dropdown, choosing the contacts option will result in the fastest Xero sync:
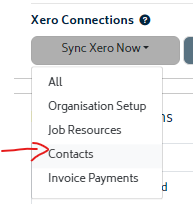
You'll be notified that "A request to sync Contacts data from Xero has been registered, you will receive an e-mail once completed." This process should be completed momentarily.
Note: If you are synchronising a new currency for contacts from Xero, you will need to run a full sync in order to update the organisation information.
Navigate to the list page to see the contact or contacts have been imported. If not, wait a minute or so and refresh the page.
- If your Xero contact does not show as a supplier in Gojee, it may have been imported as a customer instead (or as a raw contact) due to how Xero automatically categorises contacts. You can set it as a supplier in Gojee manually.
Next: Customer Price List.