
Creating Invoices
View Job Invoices
To view the job invoice page, use the Job Actions button and select Invoice. This will direct you to the job invoice page.
If you have raised one or more invoices for the job, you will be able to see all the invoices and their relevant status as as detailed below:

The numbered items in the image above are described below:
- PDF Document link: Click on this to view and download a copy of the invoice in PDF format generated from Xero.
- Xero Deep Link: Click on the Xero Invoice No, which will take you inside Xero to the actual invoice (Note: you will need to login to Xero to access this).
- Email Invoice: Click “Email Invoice" button, and you will be provided an option to email the invoice through Gojee to your customers. See the section below on emailing invoices for more details.
- New Invoice: This button allows you to create a new invoice altogether for a customer.
- Invoice Status: Displays the status whether the invoice has been emailed to a customer.
Creating Invoices
To create a new invoice, you have two options:
-
Select "Invoice" directly from a job's Job Actions. This will direct you to the list of invoices for that job.
-
You can click "New Invoice" from the top right of the job invoice page to generate an invoice from either:
- The BOM if the job is a Fixed Price job
- Whatever has been consumed onto the job if the job is a Do & Charge job.
-
You can also click "Create Invoice from Quote" to pick a quote to replicate as a basis for the invoice.
-
-
From the Navigation Dashboard, you can also click “Invoicing and Payments”, then choose “Create New Invoice". From there, select the job number that you wish to raise an invoice for from the dropdown.
From either method, you will be directed to invoice creation page:
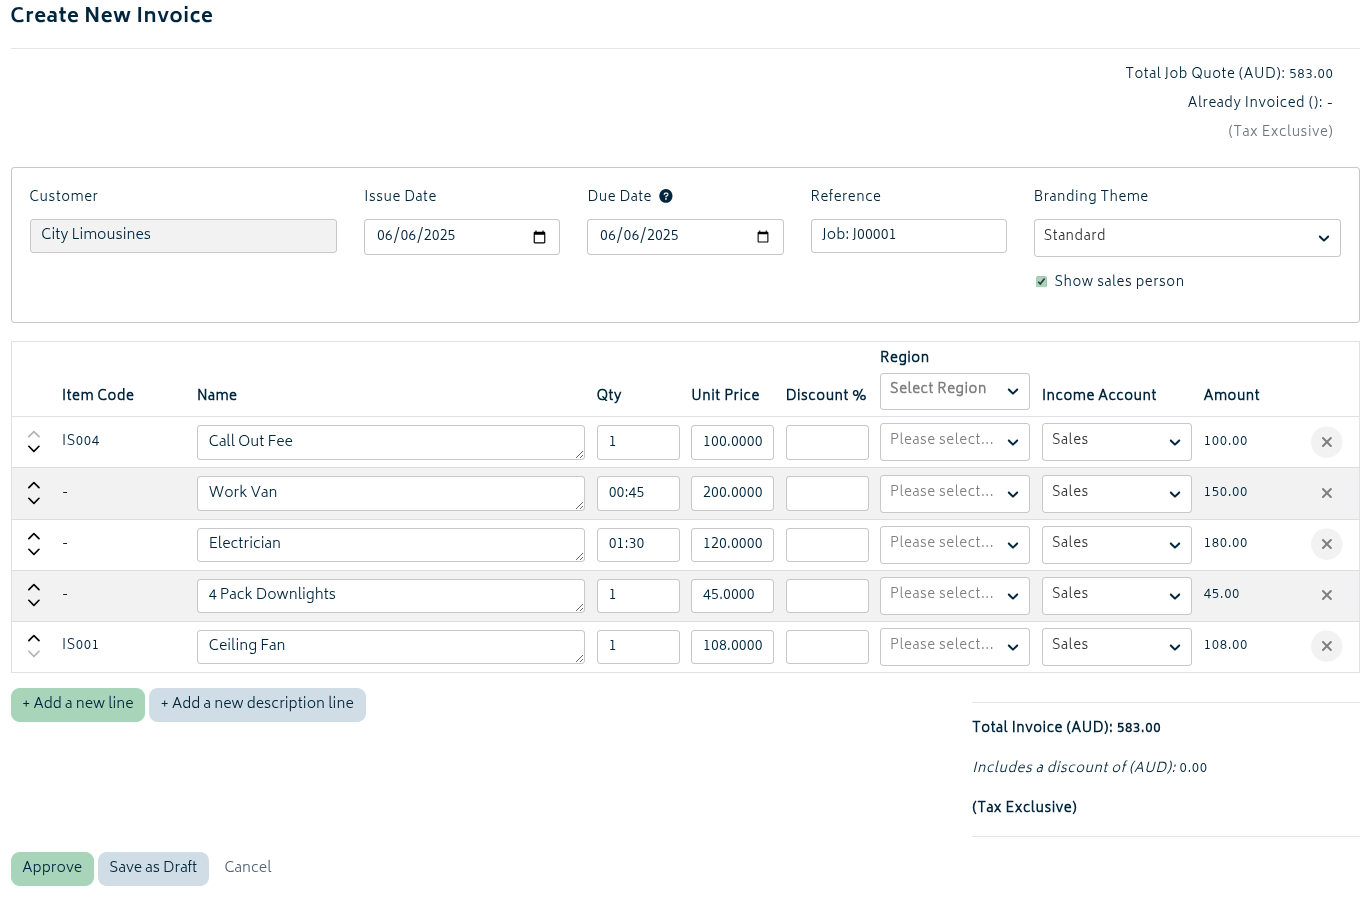
The items from the image above are described below:
- Issue Date: The day the invoice was sent out. This defaults to the current day but may be backdated or postdated as required.
- Due Date: When the invoice is expected to be paid by. This can be set in Xero to default to a specific number of days from creation.
- Reference: This field populates as a combination of the customer PO number and job reference number from the Job Settings tab. This is an editable field so you can add or modify this text as required.
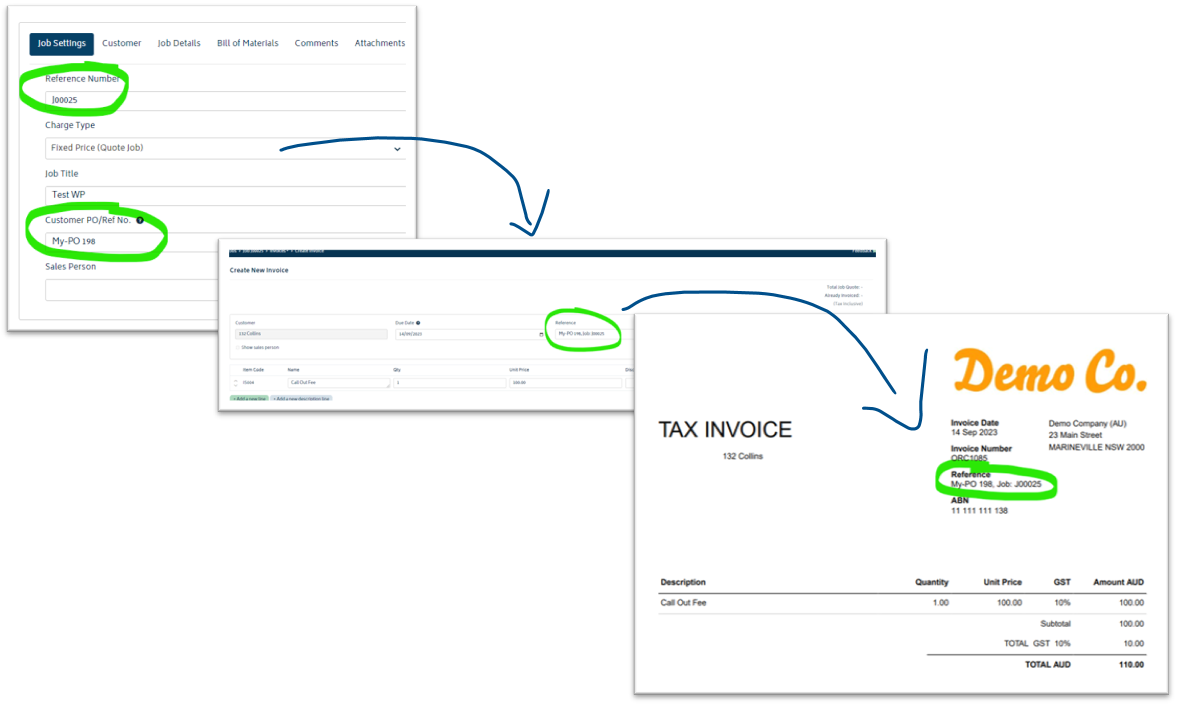
- Branding Theme: You can switch from the default organisation branding theme to a different one if required by this invoice. To learn about setting up Xero Branding Themes, please read over Xero's article on the subject.
The name section that shows for each item on the invoice is driven off the following setting in order:
- If a user has made a change to the quote/invoice description of the item on the BOM, it will be the preferred line item name for the invoice:
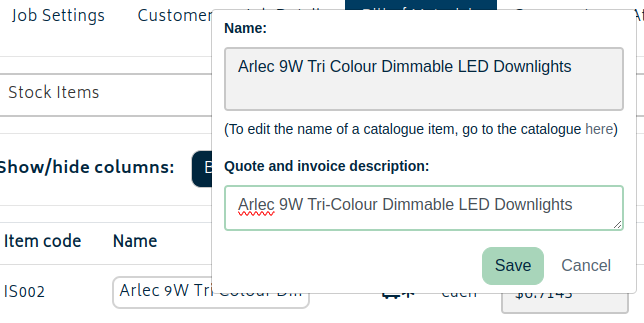
Note: Be sure to hit the save button at the bottom of the page when finished editing any details of the BOM.
- If no change is made on the BOM, the the name defaults to the invoice/quote description for the item (if it exists):

- Otherwise, the name will default to the name of the item from the catalogue:

Note: Line item names are freely editable. Whatever text you enter for each line item in Gojee will be what is displayed on the invoice generated in Xero. Changes made to the name on this page will not be propagated back to the catalogue item or to the job BOM.
The (x) icon allows you to remove a line item altogether from an invoice. This will not remove the item from the BOM - it will simply remove the item off this particular invoice in case you need to split up and create multiple invoices for the job.
“Add a new line” allows you to add an entirely new line item that wasn’t part of the actual Bill of Materials while creating a job.
- This is usually used for cases where you need to show the line item detail in a different format that doesn't exactly match the BOM or add additional service charges.
“Add a new description line” allows you to add an additional text field where you may insert more details about an item or the invoice if you need to. This line will show on the invoice, but it won't have a price attached to it.
After the invoice has been prepared, you have the following options to proceed:
- Approve: Clicking “Approve” will automatically create a new invoice in the system and make it payable.
- Save as Draft: Allows you to create a not-yet-payable invoice and update information as required before approval.
- Cancel: Will back out to the job invoice list and not save any of the changes made to the invoice.
Note: If you want to check over the invoice for approval and do not want to actually invoice the customer yet, please select “Save as a draft invoice” instead of approving the invoice right away. You can always come back and edit it later.
After clicking “Approve” or “Save as Draft” you will be navigated to invoice page for that particular job.
Email Invoices
Clicking the Email Invoice button allows you to email invoices directly to your customers.
To email the invoice, follow these steps:

- Click on the email button from the invoice list
- Alternatively, you have the option to email an approved invoice when viewing the payment status screen.
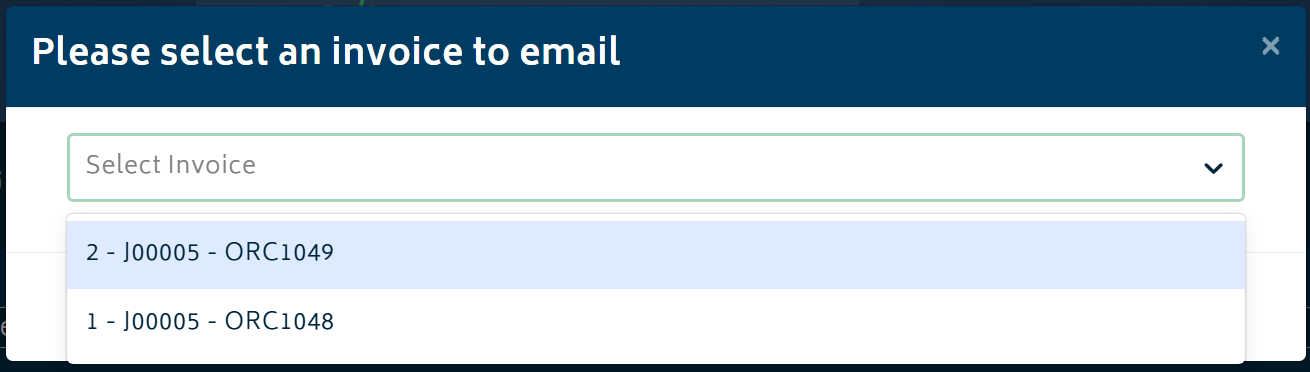
- Choose the document you'd like to send from the dropdown list:
- You'll be presented with the following modal:
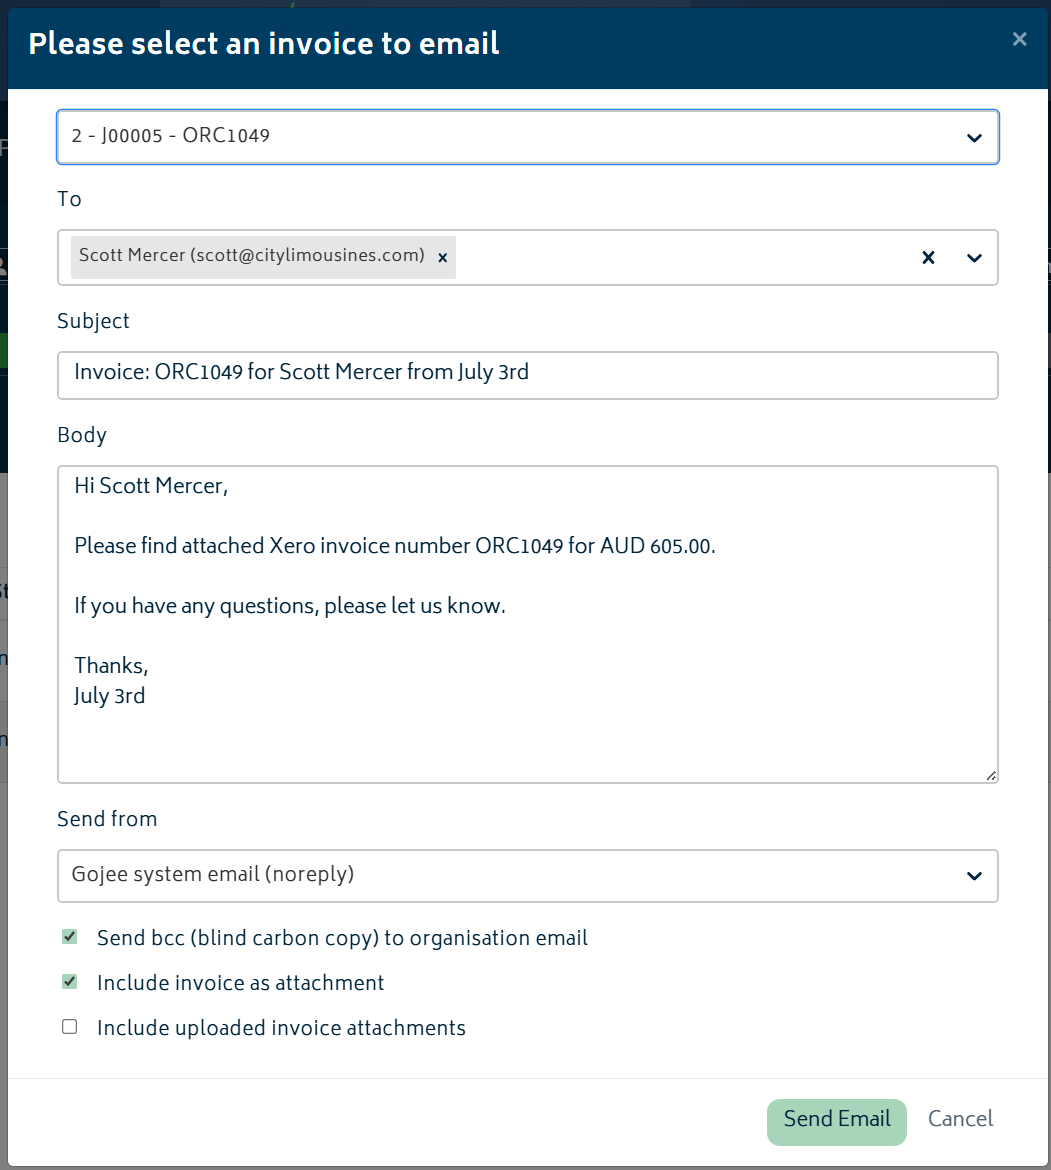
The email will default to the customer's email as set up in the customers section. A new email can be added, or the email can be changed. The subject and body will default using the invoice details, including the invoice number, amount, and the sender’s organisation name. Options are provided to BCC the organisation email, include the invoice PDF as an attachment, and include any files already uploaded to that invoice.
If your organisation has connected Microsoft or Google email accounts, the email modal will also include a Send from dropdown to pick where the mail is to be sent from. Users can send from an available connected mailbox. The default account for sending emails from can be configured in Organisation Setup > Email Settings.
To send the email, hit the Send Email button. Once the invoice has been sent, the "Sent" envelope icon will become visible to show the invoice has been sent (if this status doesn't show immediately, simply refresh the page).
View all Invoices for all Jobs
From the Navigation Dashboard, click “Invoicing and Payments”, then choose “View All Invoices". Alternatively, select Reports > Invoices from the menu. This will direct you to the invoice list page:

- You can toggle between different status(es) to view invoices in different stages in Xero. To view all the invoice at one go, you may select ALL. You can also type in job reference number, customer’s name or the invoice number itself in the search bar to search a particular invoice after clicking ALL.
- To edit any invoice, or to take a payment against it from within Gojee, simply click on the row in this table and the Invoice Edit page will open.
Next: Edit Gojee Invoices.