

Bulk Time Entry
Time Entry
While other methods of time entry are more visual and good for day-to-day tasks, the bulk Time Entry tool is for when you want to record a lot of users and/or times.
It might be the end of the month and you've got to compile your notes of who showed up what day and for how long, or your employees may not have the luxury of logging into the system to track their times by themselves regularly. Workers with the "Entry" role can record their own times, and timesheet managers can enter anyone's time.
Whether you want to just record some hours that have been worked or you need to finish recording a whole team’s worth of individual daily tasks, the Time Entry page allows you to do so quickly and easily.
Use Bulk Time Entry when you want to record hours or start/stop times in bulk. Use Bulk Logged Work when you want to create completed logged work intervals against jobs or non-job activities in bulk.
Hours
To get started, navigate to My Work > Time Entry.
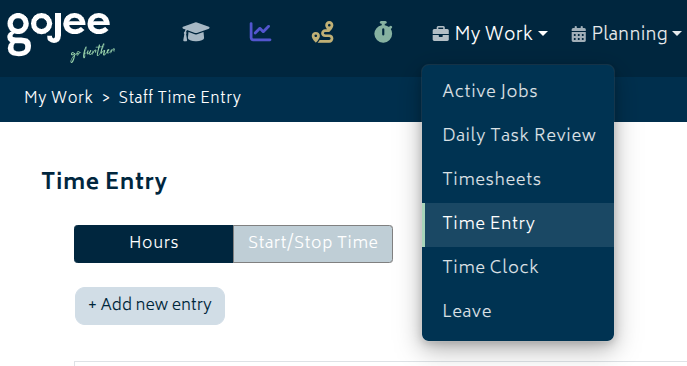
The Time Entry page has two modes, hourly and by start/end time. On desktop, five blank entry rows are created for you to start with. On mobile, the page opens with a single blank row. You can add more entries as needed with the Add new entry buttons.
The button at the bottom will follow you down the page if you want to add more as you make new entries, and the one at the top will allow you to add many slots at once. You can delete slots with the X button beside the slot on the right. There is also an Import from CSV function which allows for imports of times (from other systems, etc.)
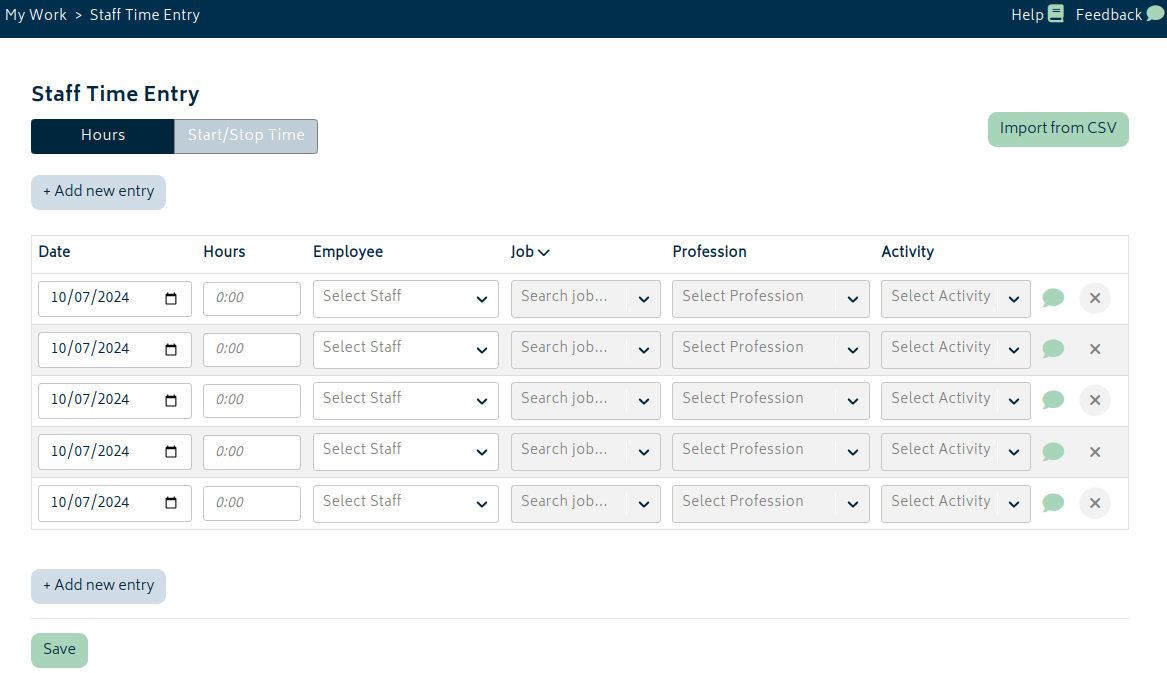
To enter the times:
-
-
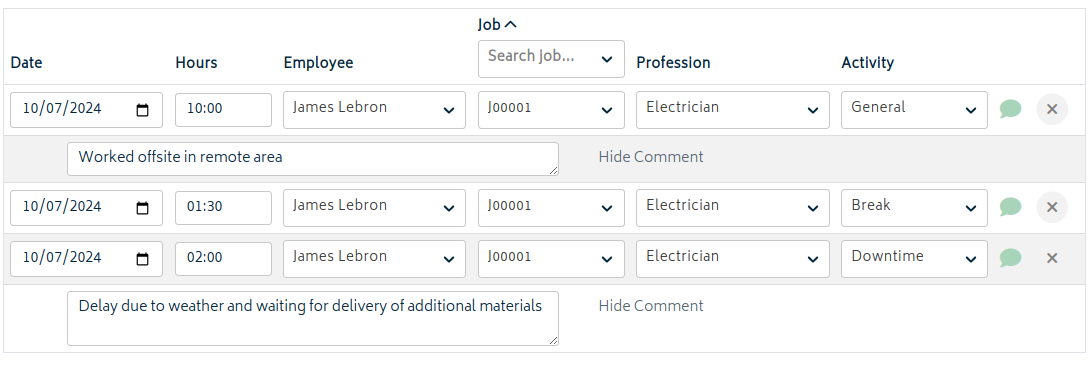
Click on the date to choose which day you wish to record time for. You can type the date in or use the calendar icon to select a day.
-
Enter the hours. Typing a number will resolve to that number of hours, eg. 8 will become 08:00.
-
Type or select the employee.
- If you are a worker with the Entry role, this field will not be present.
-
Type or select the job number.
- Non-job is available as an option when you need to record time that is not allocated to a customer job.
- If all entries are for the same job, you can set all at once with a shortcut.
-
Select a valid profession (for job-related entries).
-
- Choose what type of time you would like to record. Defaults are General, Break, and Downtime but this will respect custom types set by your org.
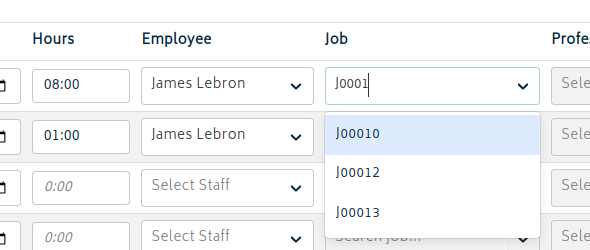
Use of the Tab key to jump to the next field and arrow keys to select from the dropdowns is recommended for efficiency.
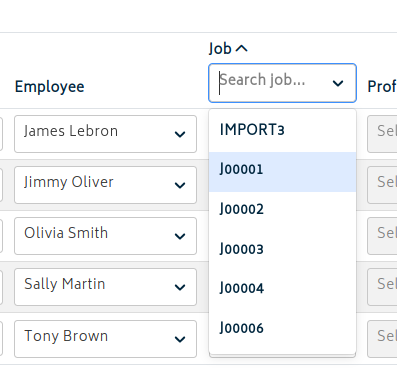
If all entries are for the same job, there is a shortcut for entering the times. Click the chevron next to the Job header and it will open a batch job entry dropdown.
Clicking the green speech bubble will open an area to insert a comment for the time.
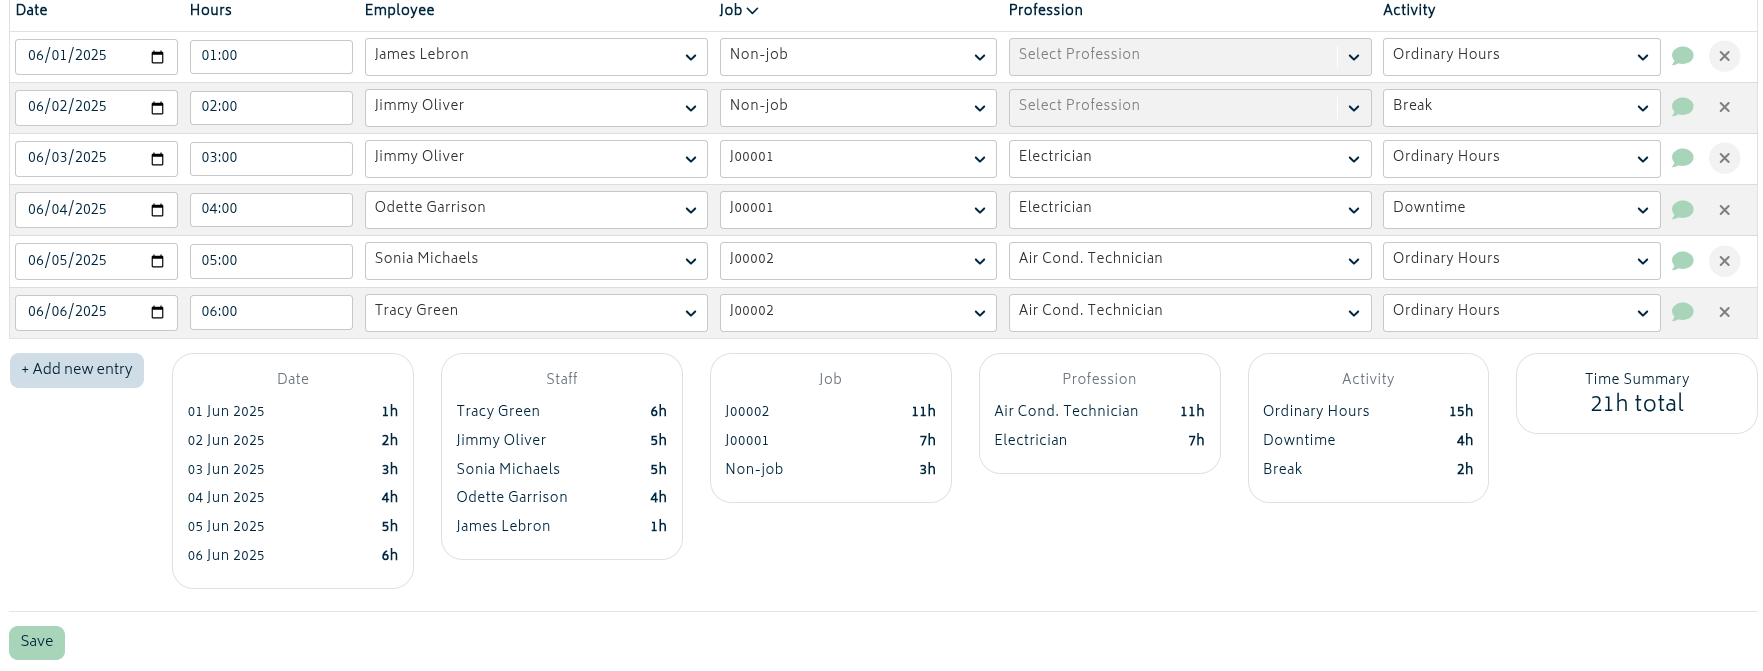
When entering times, you will get a summary of all time entered below the rows. The summary columns will only show up if relevant.
When you're done with entering times, hit the green Save button and the times will be recorded in the system and in the session log. You'll be able to view recorded times in the session log below the Save button. These are temporary and will not be kept if you log out or refresh the page. You can also click the "Show in Summary" tickbox to pull these values back into the summary of entered time to compare all recorded entries with the data in the form fields.
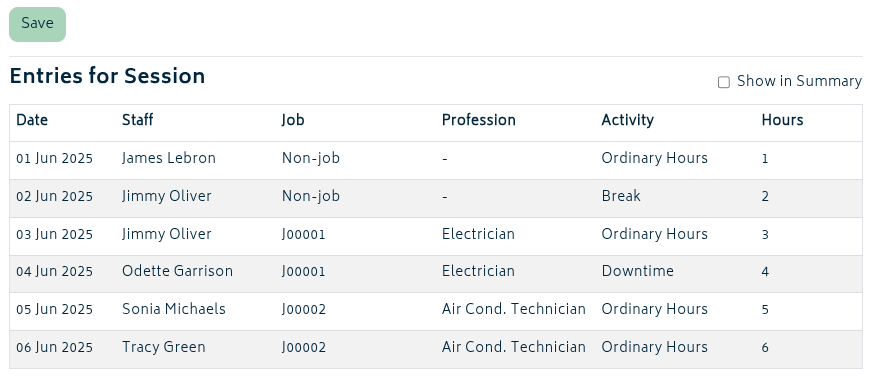
Note that in the case of CSV entry, the entries made via CSV will not populate into the session entries section.
Advanced tip: If you need to record a person under a profession they don't actually have (substituting, cross-training, etc) you can fill in the time, job, and role information for someone else and then change the person's name to get around the warning.
Start/Stop Time
The start/end time mode allows you to be more granular with time records, but it functions much the same way as the hourly time input. This can be useful for when you have multiple jobs in a day or want to track exactly when events occur.
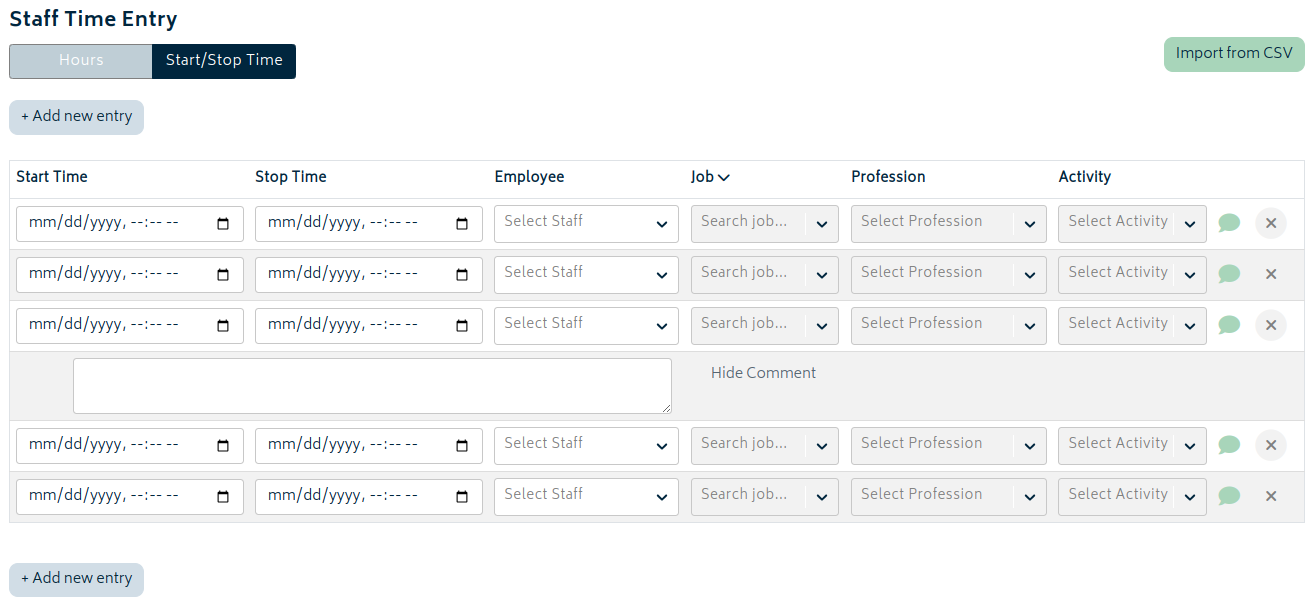
Entering times can be done to the minute.
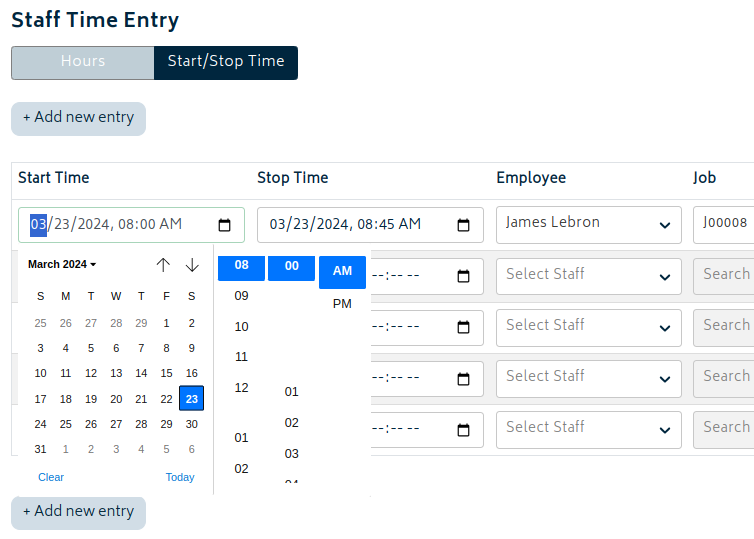
As with the hourly time entry sheet, although use of the mouse and the number keys above the keyboard is still an option, the Tab key and a number pad is recommended for efficiency.
When you're done filling in the times, you can hit Save to record all entries.
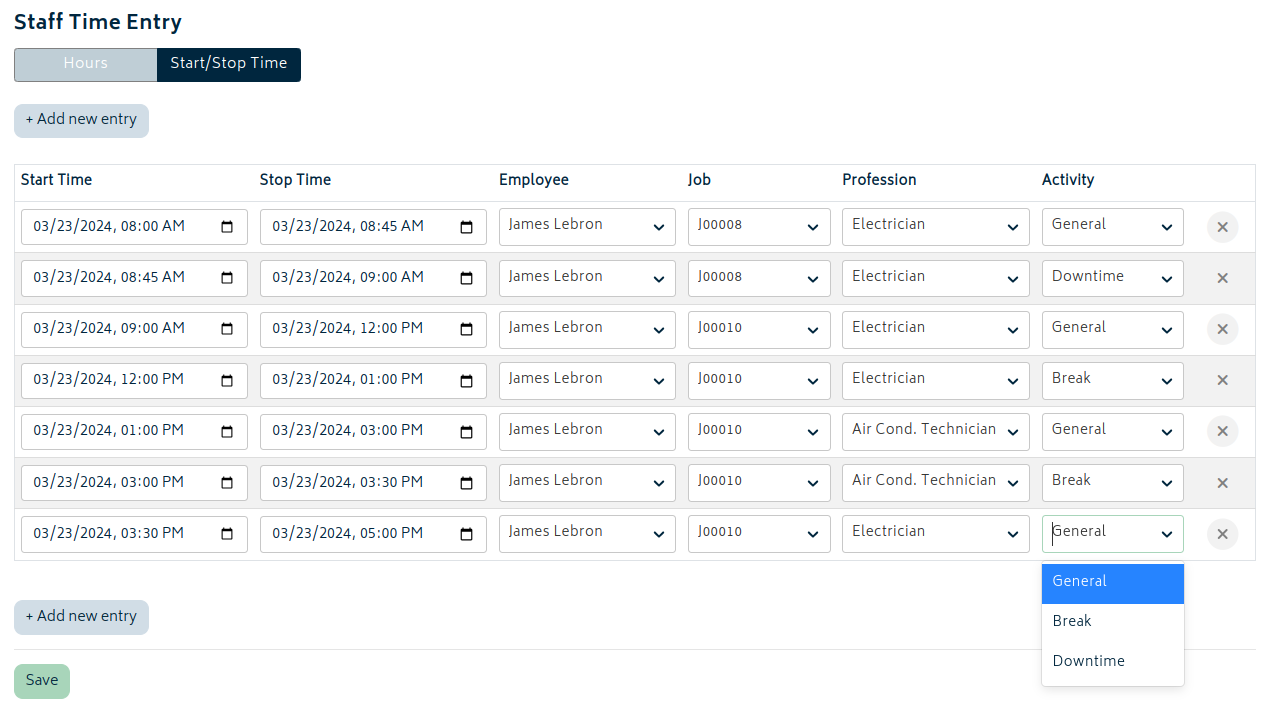
In both the hourly mode and the start/end time mode, hitting the Save button will clear the form for new data entry.
Bulk Logged Work
Bulk Logged Work is a separate page used to create completed logged work intervals in bulk. It is available from My Work > Bulk Logged Work.
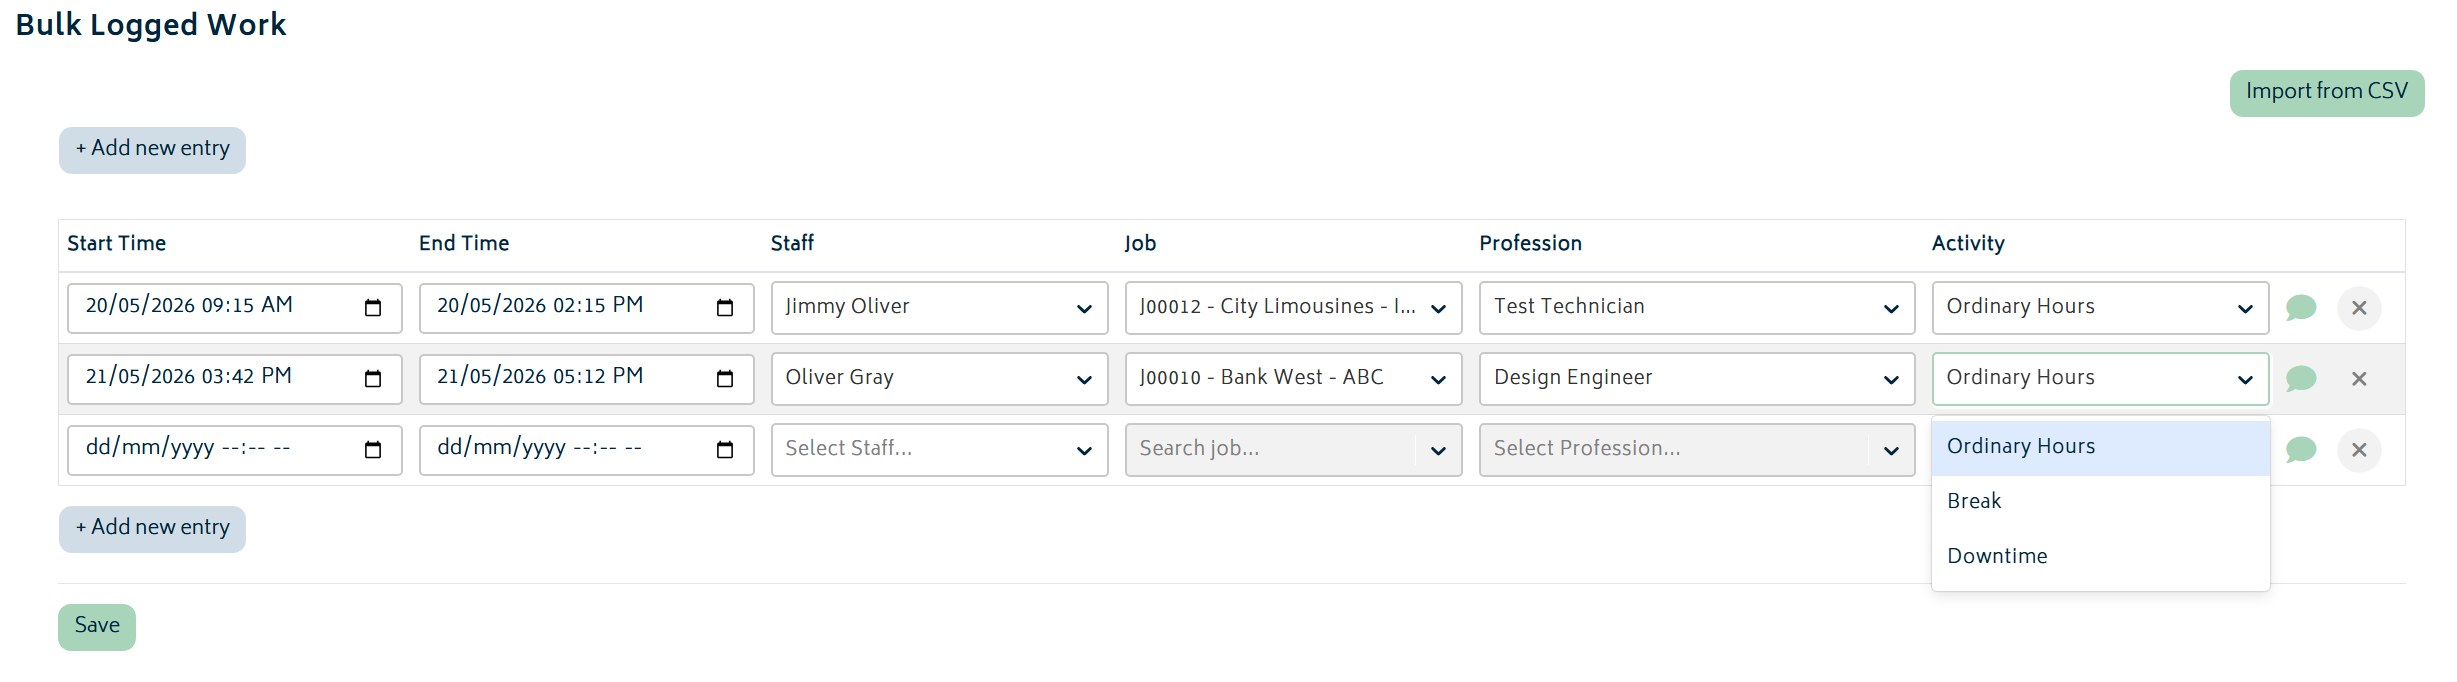
This page is designed for cases where you need to create actual logged work records in bulk against jobs or non-job activities, rather than only recording timesheet hours.
- Each row includes Start Time, End Time, Job, Profession, and Activity.
- For non-job rows, a profession is not required.
- Comments can be added per row.
- Users with timesheet manager access can enter rows for multiple staff. Other users will only enter rows for themselves.
When you save the page, Gojee creates completed logged work entries for each valid row. If a row overlaps existing work or has invalid times, the page will show row-level errors so they can be corrected before saving again.
For a faster way to enter data, bulk logged work can be imported through a CSV. It follows the same data rules and requires columns in the spreadsheet to be identical to that of the manual input system. By interacting with the Import from CSV button at the top right, you will be presented with the following modal:
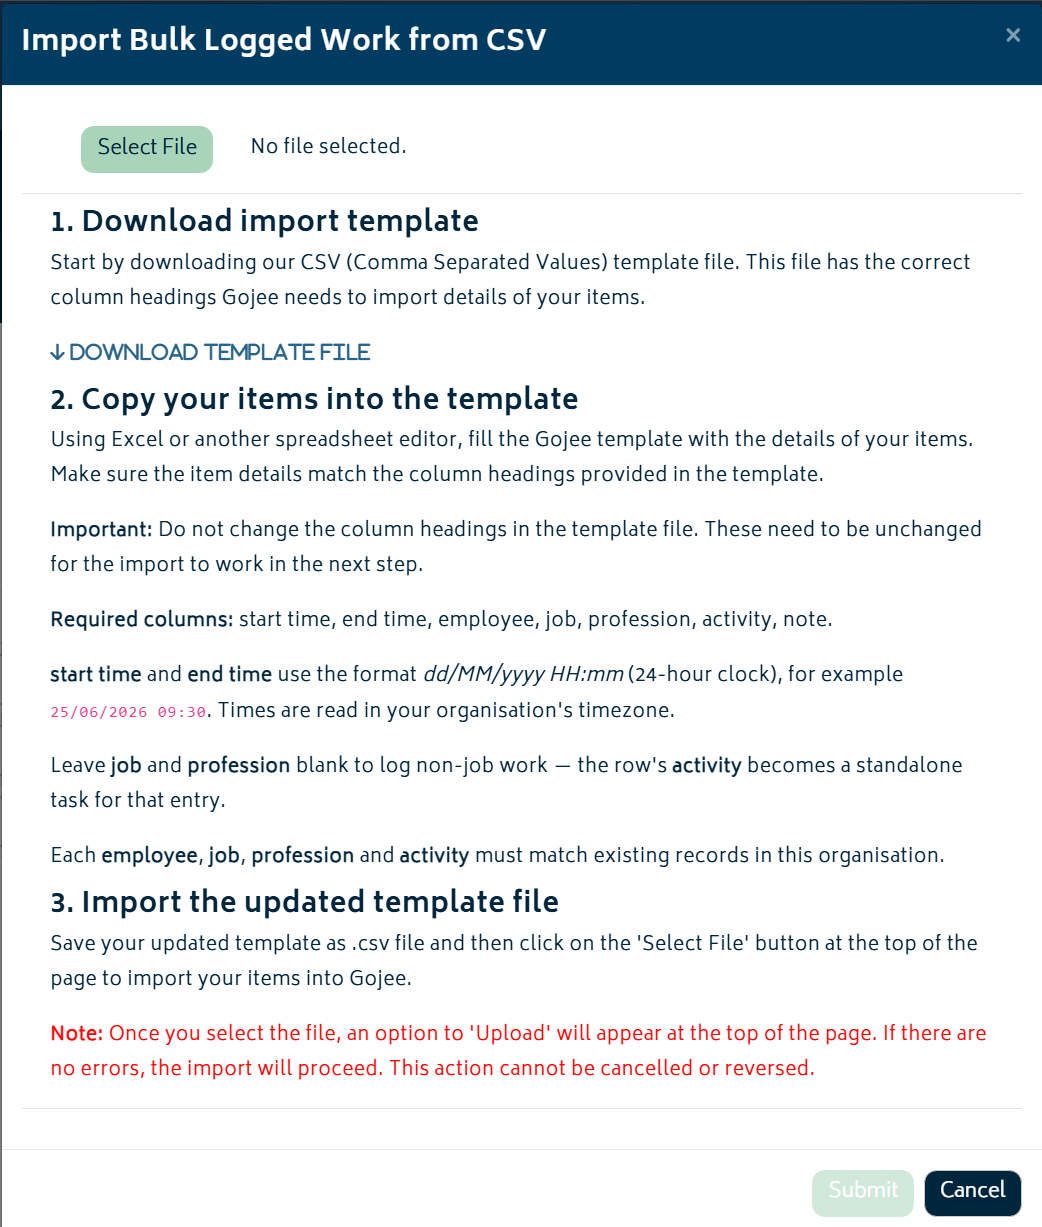
Ensure all stated requirements are met for the import to be successful. An example template file is provided in the modal as a reference. If there are any errors during the importing process, re-evaluate the sections within the CSV before closing the modal and attempting again.
Next: Leave Management.