

Scheduling Staff
Introduction to Scheduling in Gojee
Scheduling workers (employees and contractors) against tasks in Gojee is ideal for helping you plan your jobs, optimize your workers day and improve the efficiency of your business.
You can schedule your workers either against billable job tasks, or non-billable job tasks (i.e. internal tasks not charged to a customer for example).
If you'd prefer not to use proactive scheduling, you can also simply track time for your workers without scheduling tasks. Refer to Time Tracking for more information.
Schedule workers onto jobs
Scheduling workers onto a job means that when time is tracked for the job it will be allocated as a cost for the job.
Prerequisites:
To schedule workers against jobs in Gojee the following are required:
- Profession(s) have been created. Refer to this article Professions.
- Staff have been crated and assigned one or more profession(s). Refer to this article Employees and Contractors.
- You know how to create jobs and use the BOM page Jobs and Projects.
To schedule your workers onto jobs, the following steps are required:
- Add a profession onto the Job BOM page (refer to Create a Job for more information).
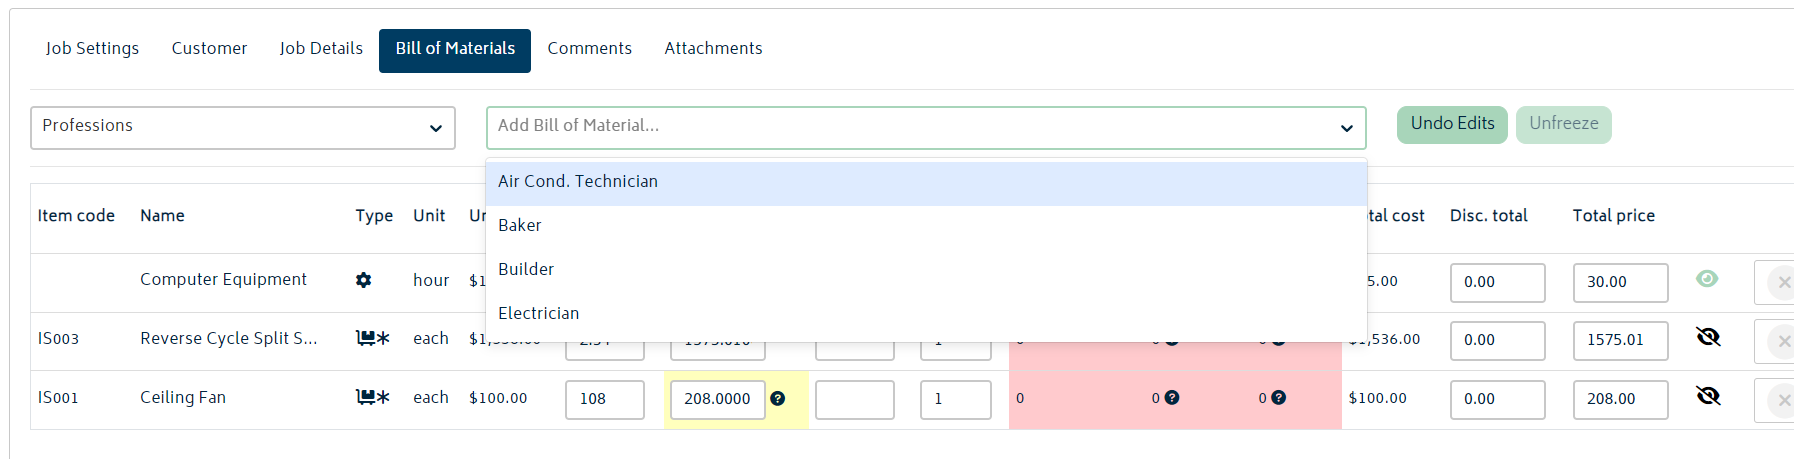
- Save & Exit the job.
- From the Job Actions menu, click on Schedule:
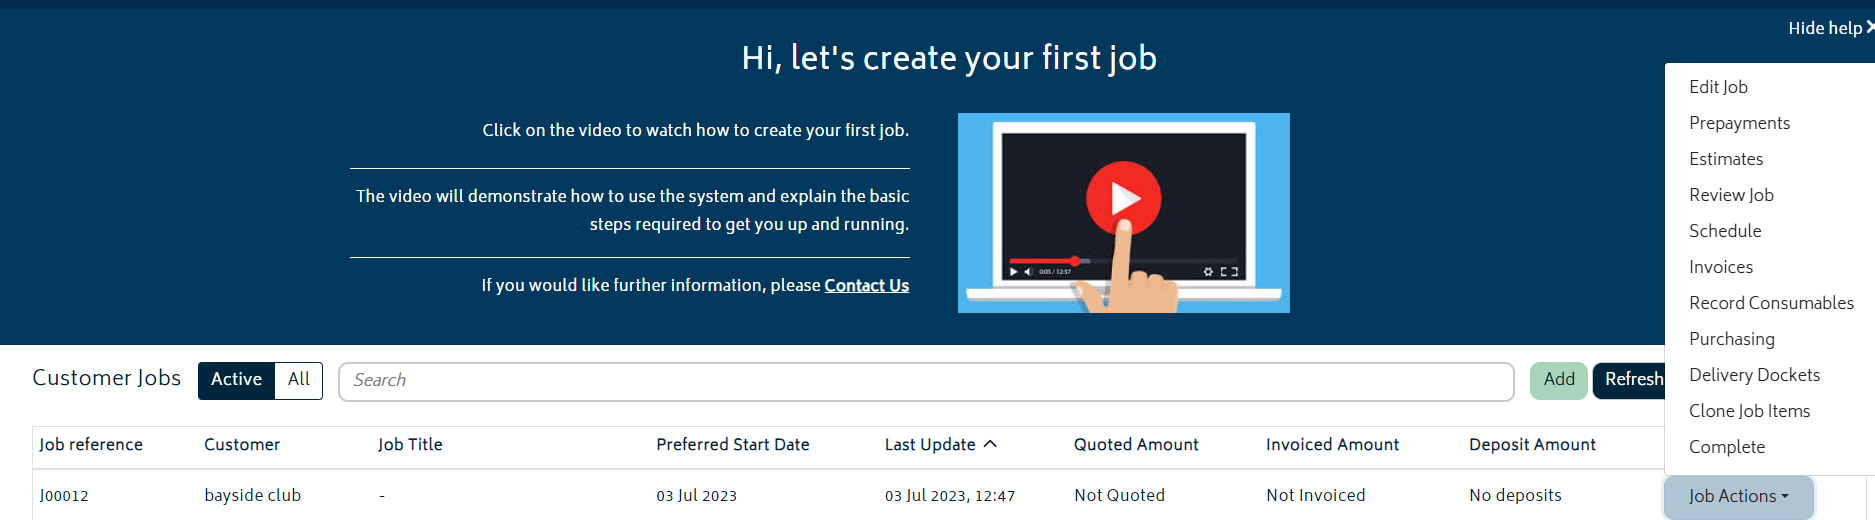
The job scheduler page will be shown. The schedules are categorised by profession - every staff that can perform that profession will be shown, and if staff have multiple valid professions, they will be shown across each.
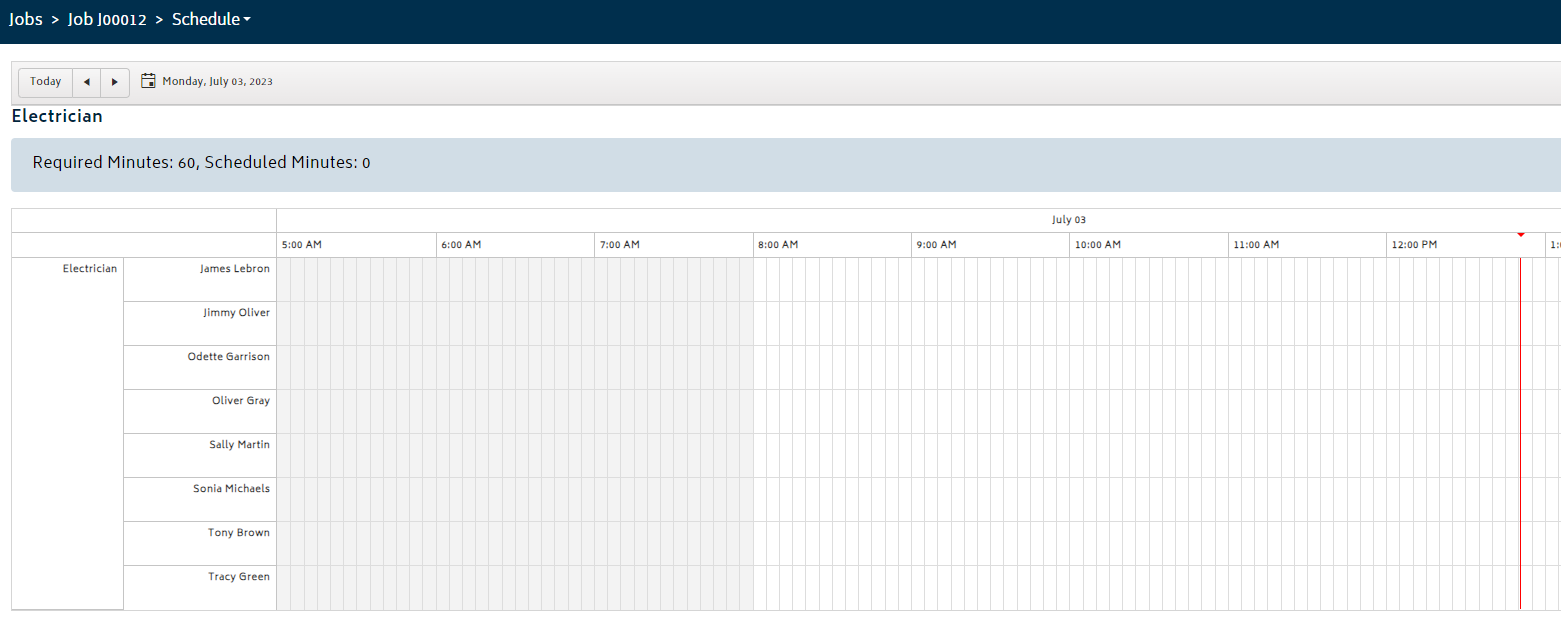
Note: In this view only the professions required for the job will be shown. The hours required for the profession (i.e. as entered on the BOM page) will be shown at the top for each profession, along with the hours already scheduled. To see all tasks for all staff refer to the Staff Scheduler Page section below.
- To add a task for a worker, simply double click on the scheduler in the location you'd like to add the task. You will be presented with the following modal:

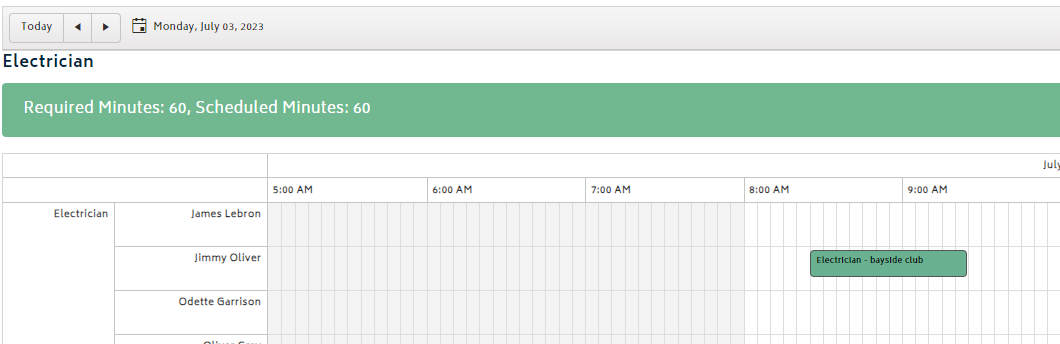
- Click “Create” button to schedule the task and it will be shown as a coloured task within the scheduler page:
Note:
- You can split tasks between one or more workers, or one or more occurrence for the same worker. To do this, simply add another task in the same profession view and modify the times of the tasks to control the total hours scheduled.
- When picking workers, you can pick multiple staff at once to create the event for all selected.
- If you want to create multiple days' worth of tasks at a time, there is an option for this under Organisation Settings.
- Existing tasks not related to this job will be shown in grey to avoid overbooking.
- Changes will be automatically saved and you can navigate away once done.
- Only professions can be scheduled from this view - to schedule breaks and downtime, you will need to use the general Staff Scheduler.
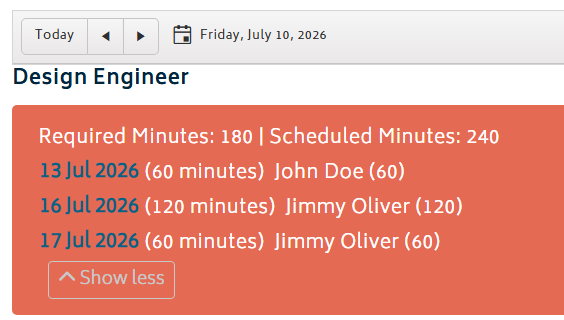
After assigning a task to the required staff members, a breakdown highlighting the required minutes, scheduled minutes, and the details of assigned shifts per day will be displayed within the information box. Interacting with any of the listed dates will bring you directly to the period.
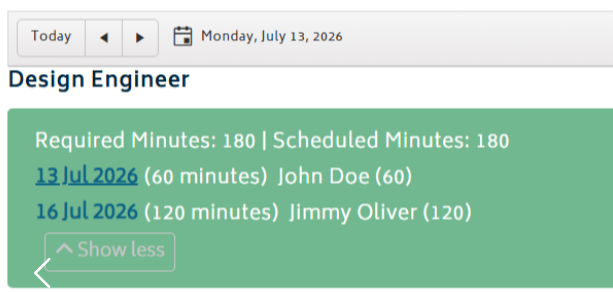
Going over the limit causes the information box to shift from green to red, highlighting the overuse of labour.
Schedule workers for non-job tasks
Scheduling workers onto a non-job tasks (also referred to as non billable tasks) mean that when time is tracked for the task, it will not be allocated as a cost for a job. The time will still be allocated to the timesheets of the workers.
To get started, you can either navigate to Planning > Staff Schedule from the top menu, or from the dashboard click on HR Management, then select "View All Scheduled Jobs". You will be directed to job scheduler page:
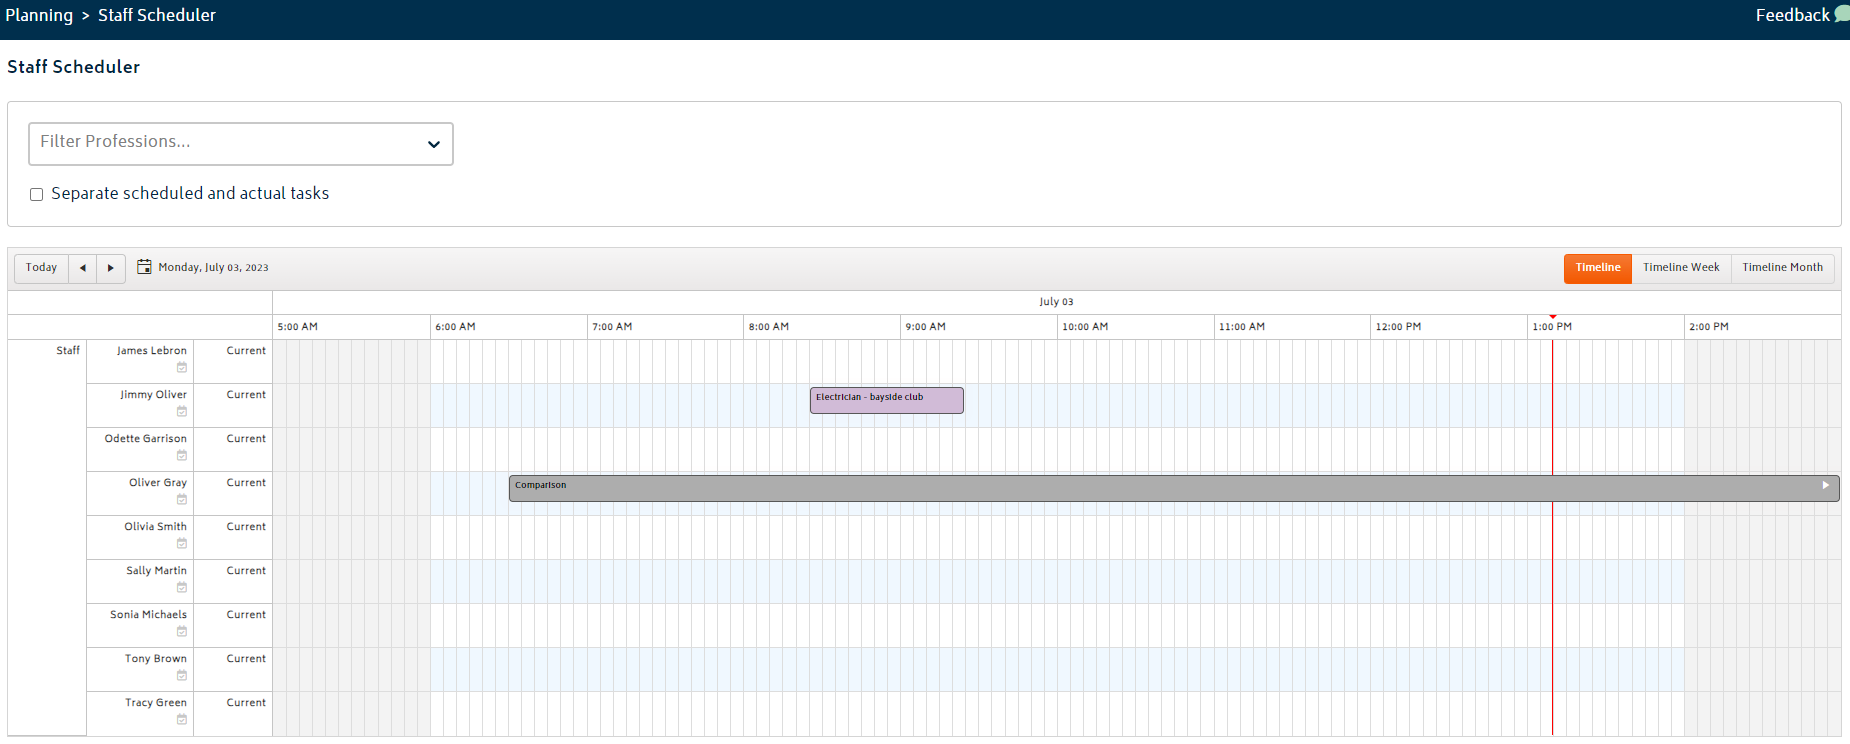
- Double click on the scheduler to create a task for the worker:

- You can change the activity type between any type of job task activity, including downtime and breaks here.
- Once the task has been created, it will automatically be displayed as a scheduled task for the staff member.
- You can review the tasks by navigating to Staff Schedule page:
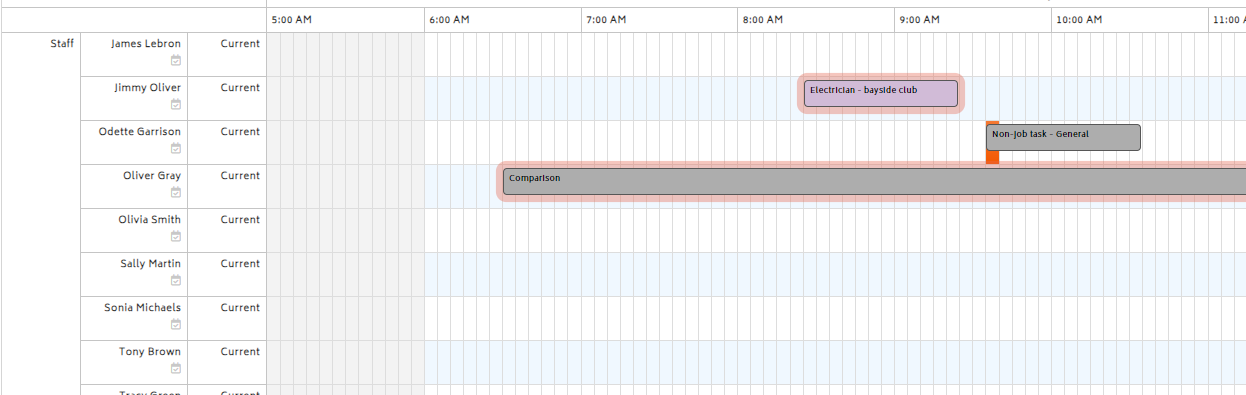
View the list of tasks scheduled for workers
All users can navigate to their My Work > Active Jobs page to see a list of the tasks they have been assigned in an agenda type view:
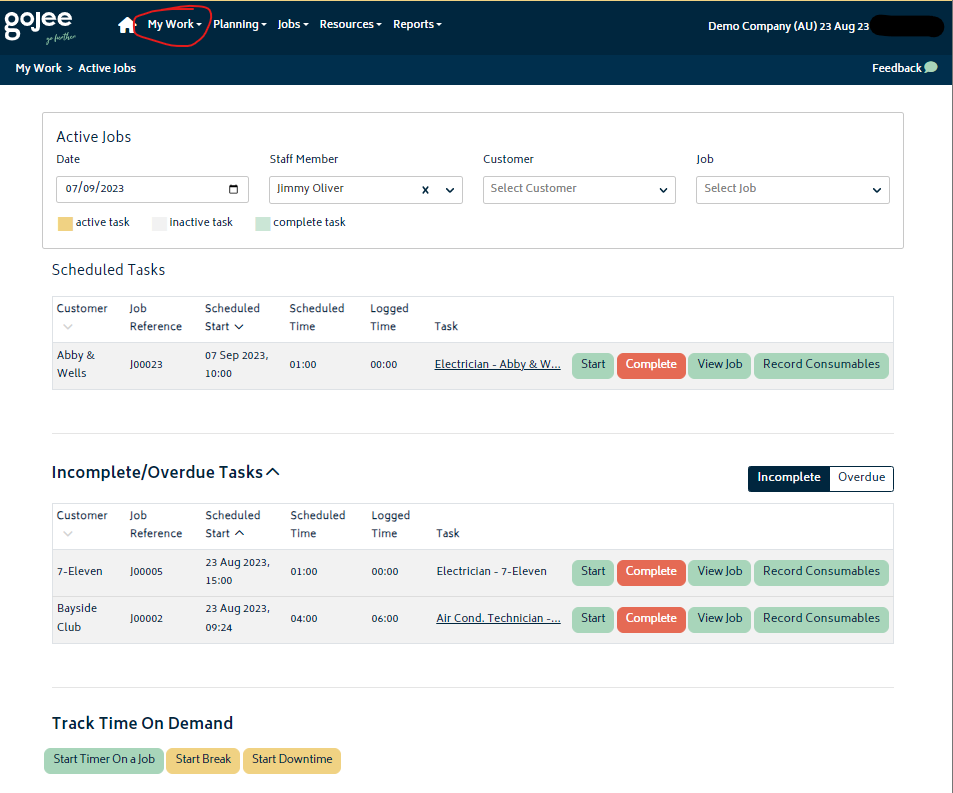
Job managers can also view the list of tasks scheduled for all workers at once on the staff schedule page.
Introduction to the Staff Schedule Page
Users with role Customer Job Manager or above can navigate to HR Management from the dashboard, and select “View all Scheduled Jobs" button. This will show users all the scheduled tasks across all workers, and can be shown in a daily, weekly or monthly view:
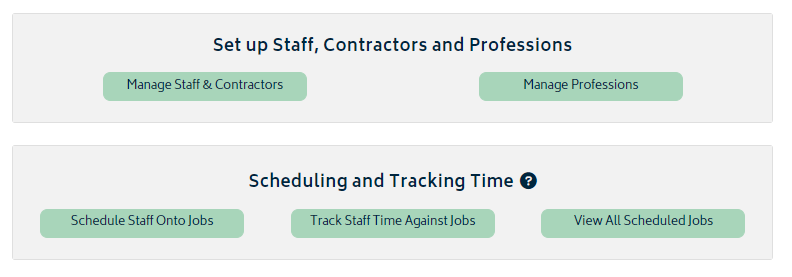
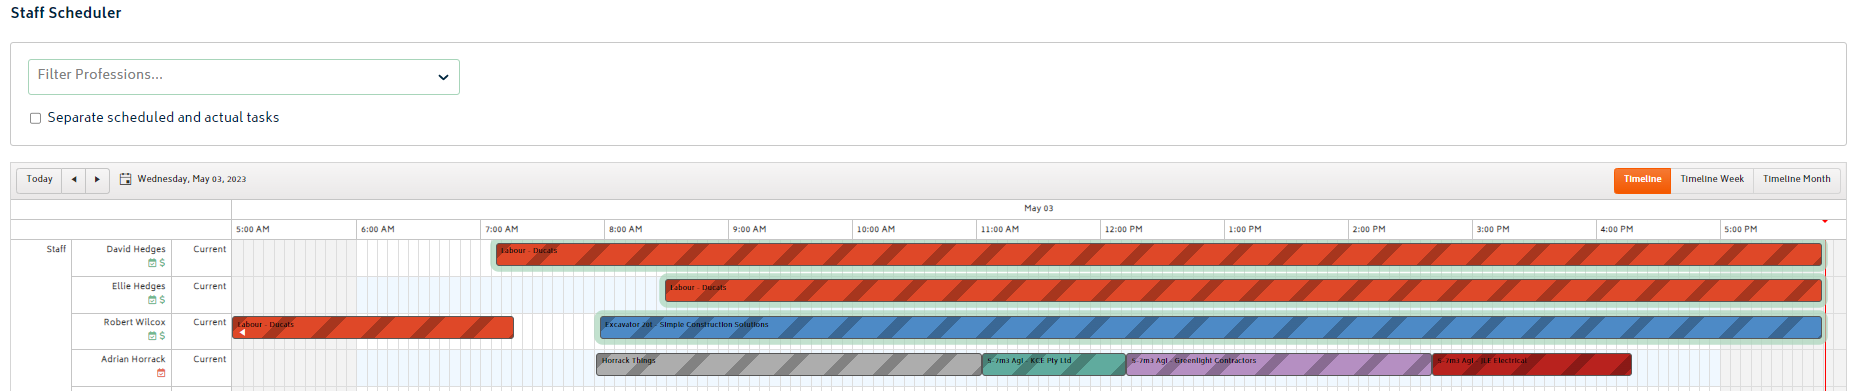
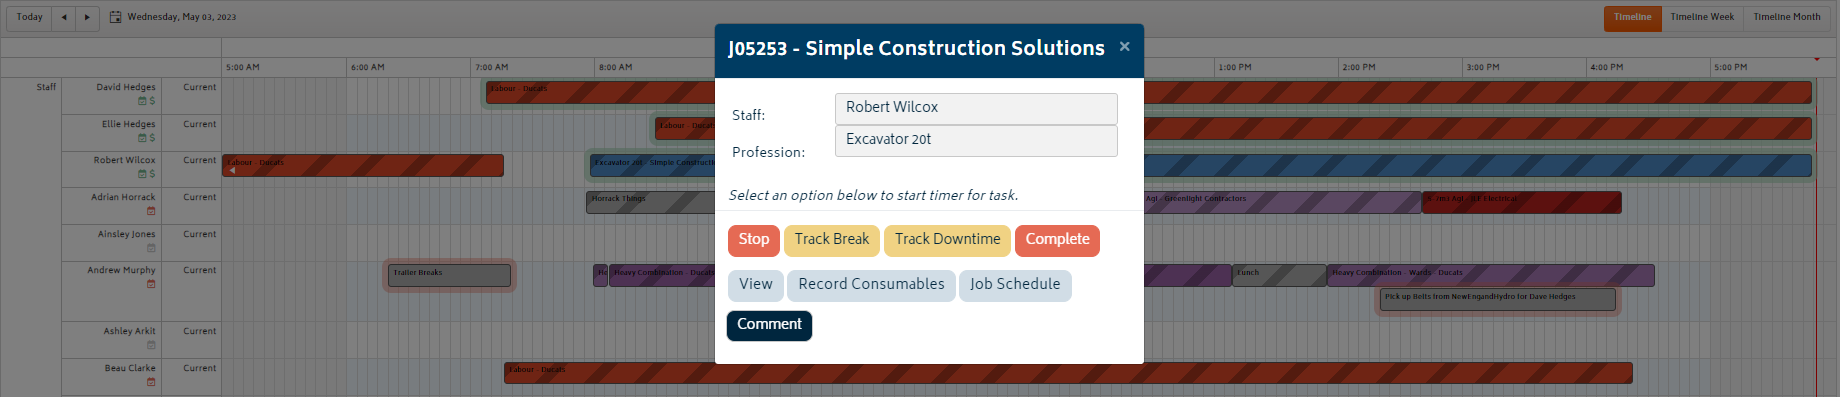
Note: You can click on any of the scheduled tasks to review the details:
Using the Staff Scheduler
Once you're on the staff scheduler page, there is a rich set of features to help you optimise the allocation of your workers, and to get a real time view of how your jobs are tracking.
The features on this page are described below:
Filter for Professions
Use this filter to show only tasks that are for the selected profession chosen from the dropdown.

Toggle to "separate scheduled and actual tasks"

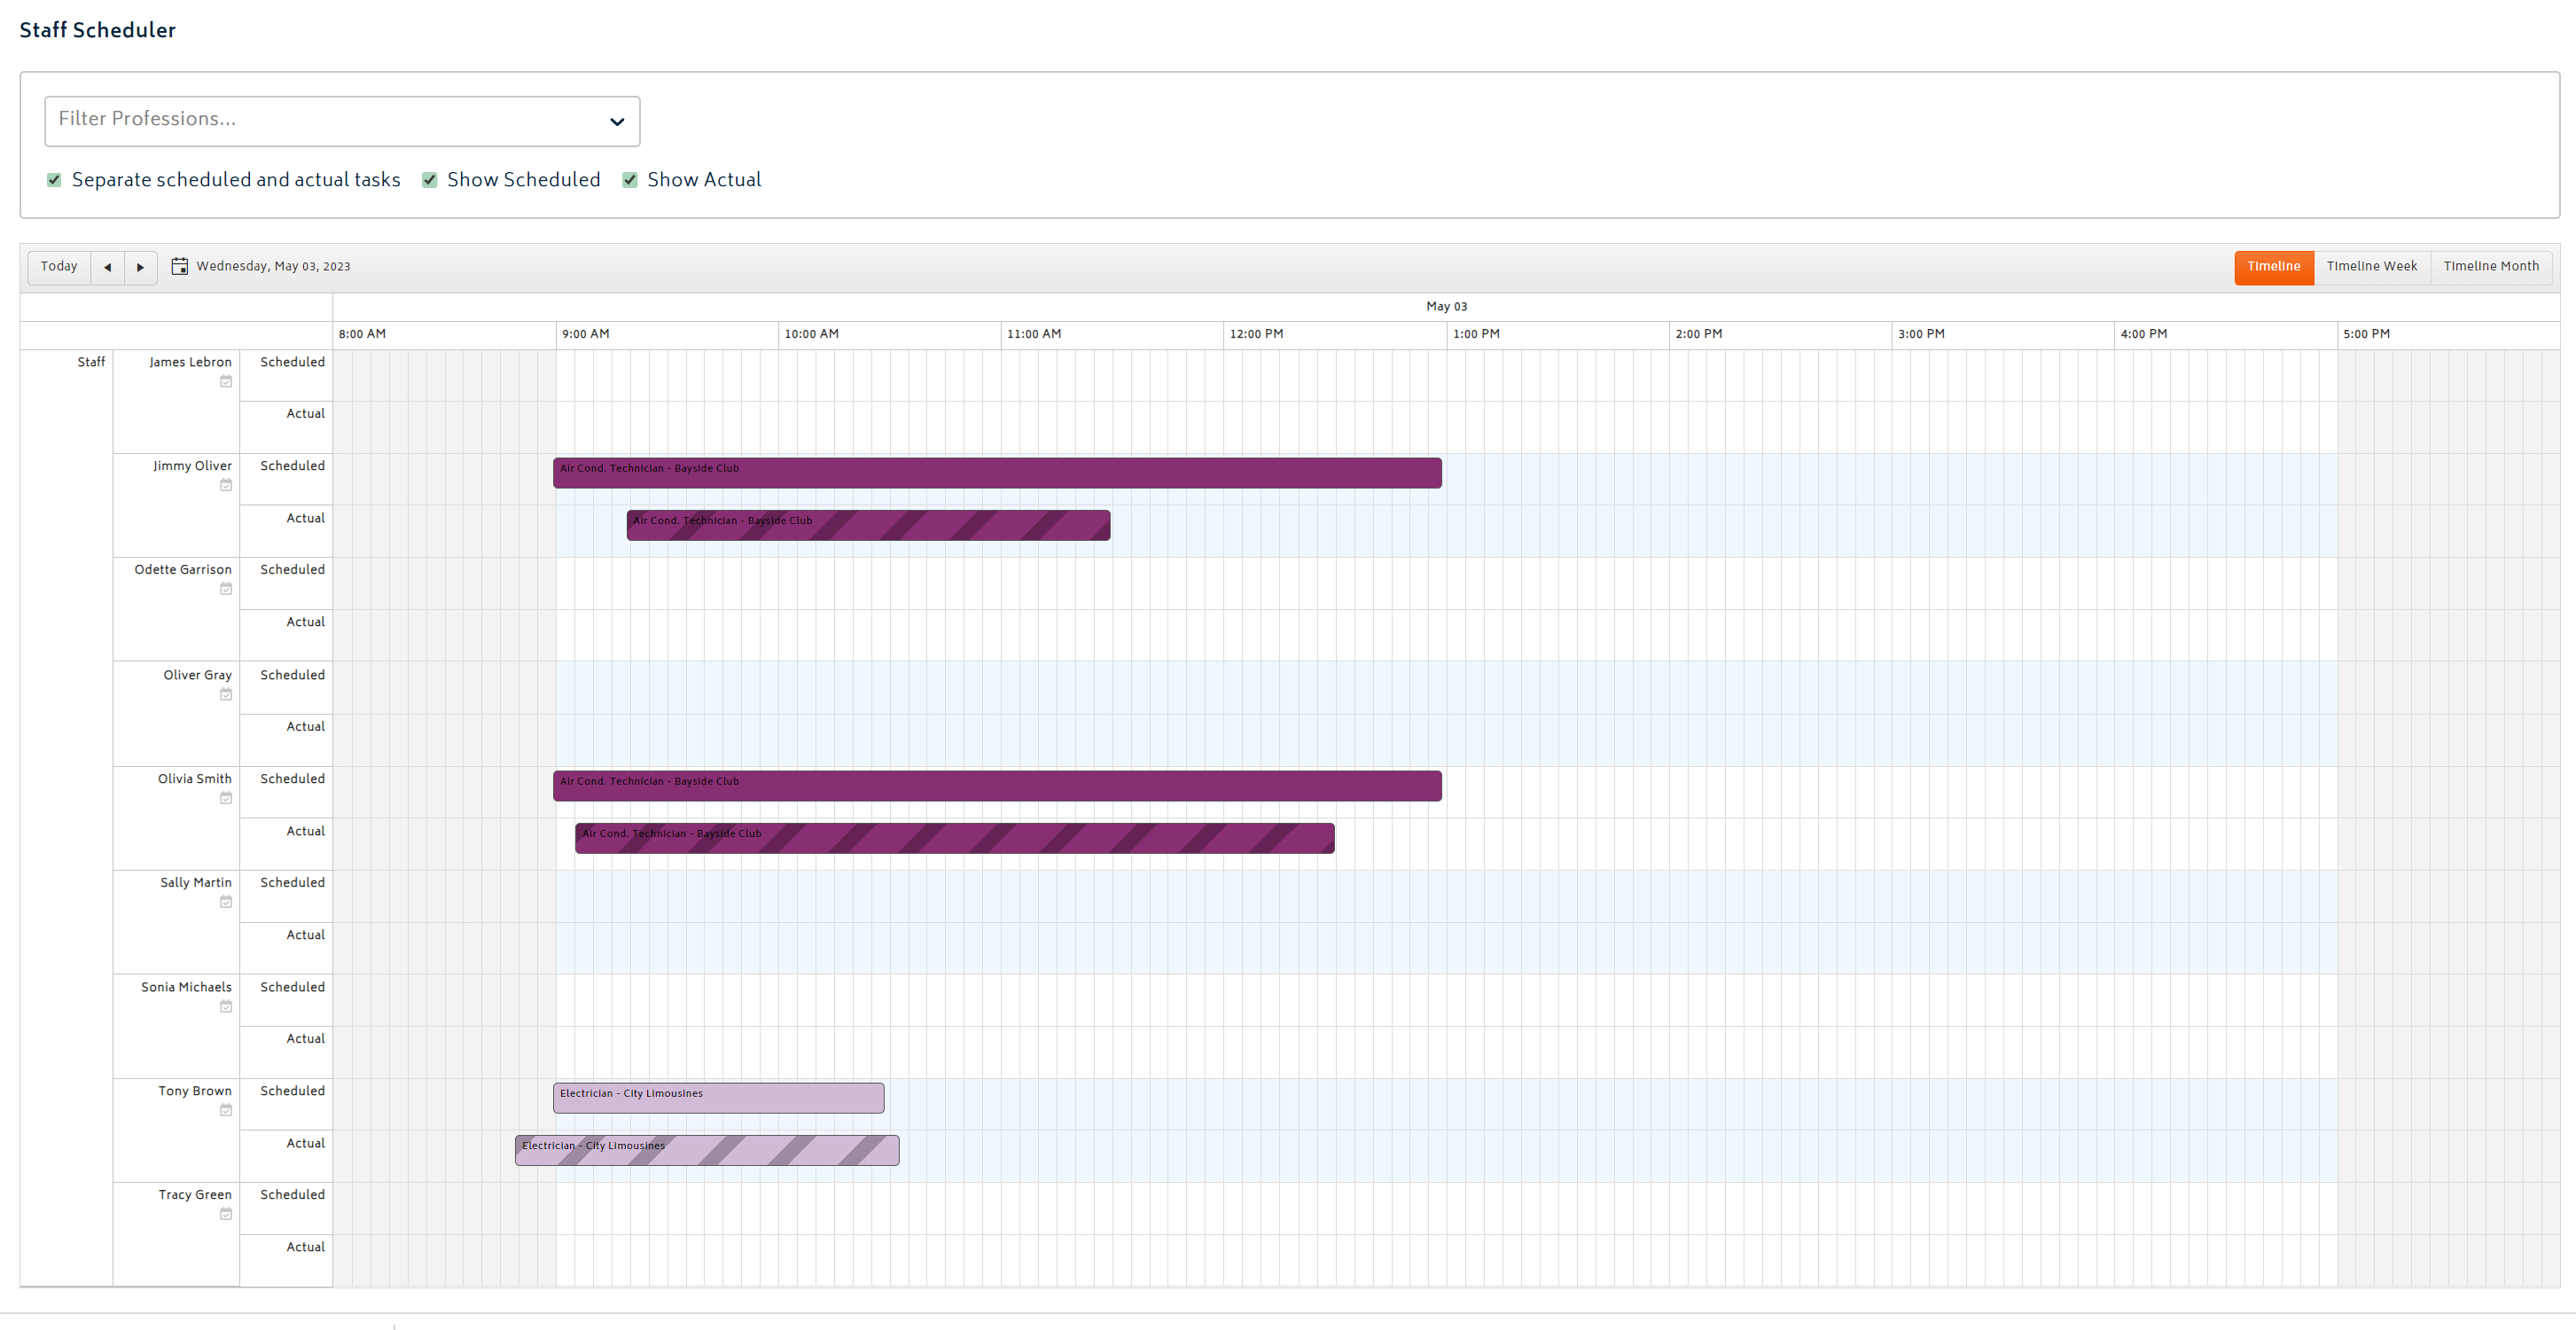
This toggle allows you to compare the estimated or scheduled hours to the actual times captured for the tasks. There are three different views available, including a joint view and an individual view for each. Examples of these options are provided below:
View 1: Both scheduled and actual tasks
View 2: Scheduled tasks only
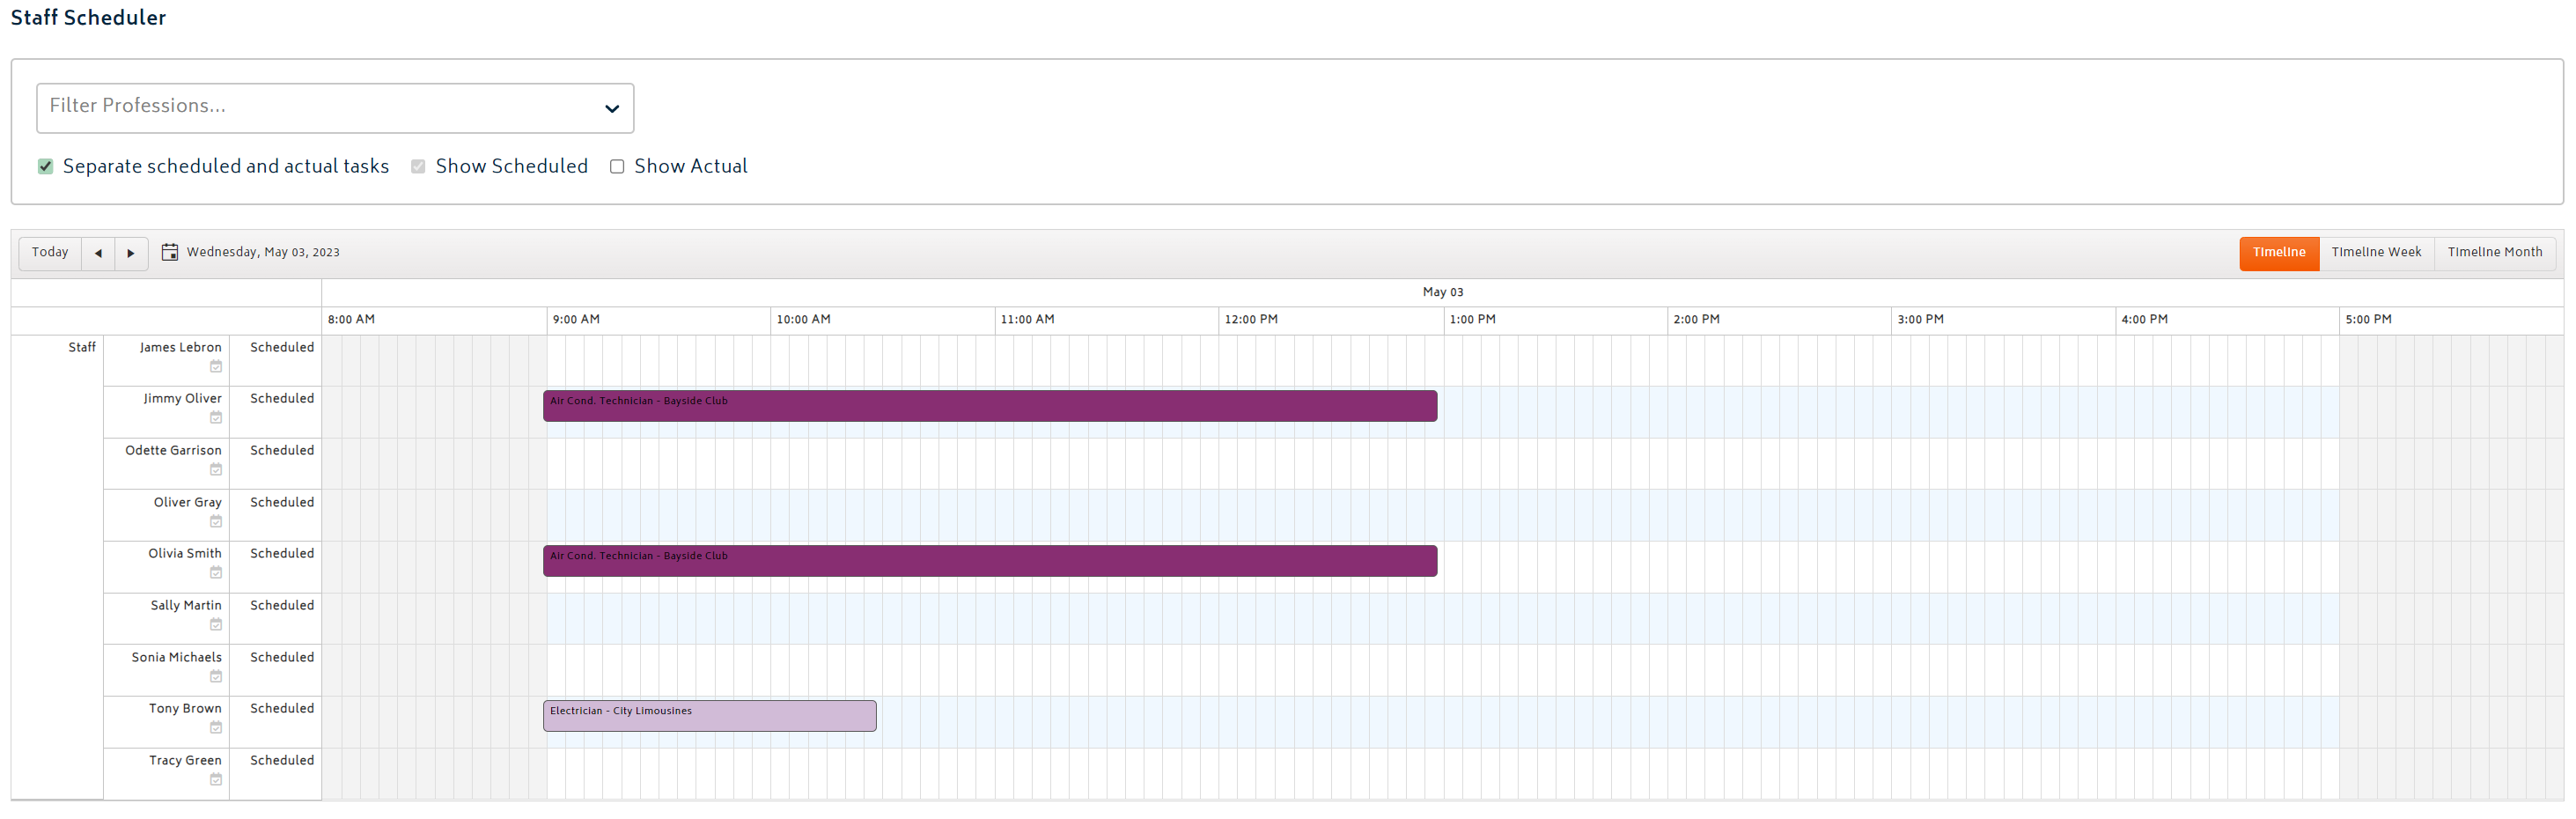
This is not actual time, its the planned time for when the task is scheduled.
View 3: Actual tasks only
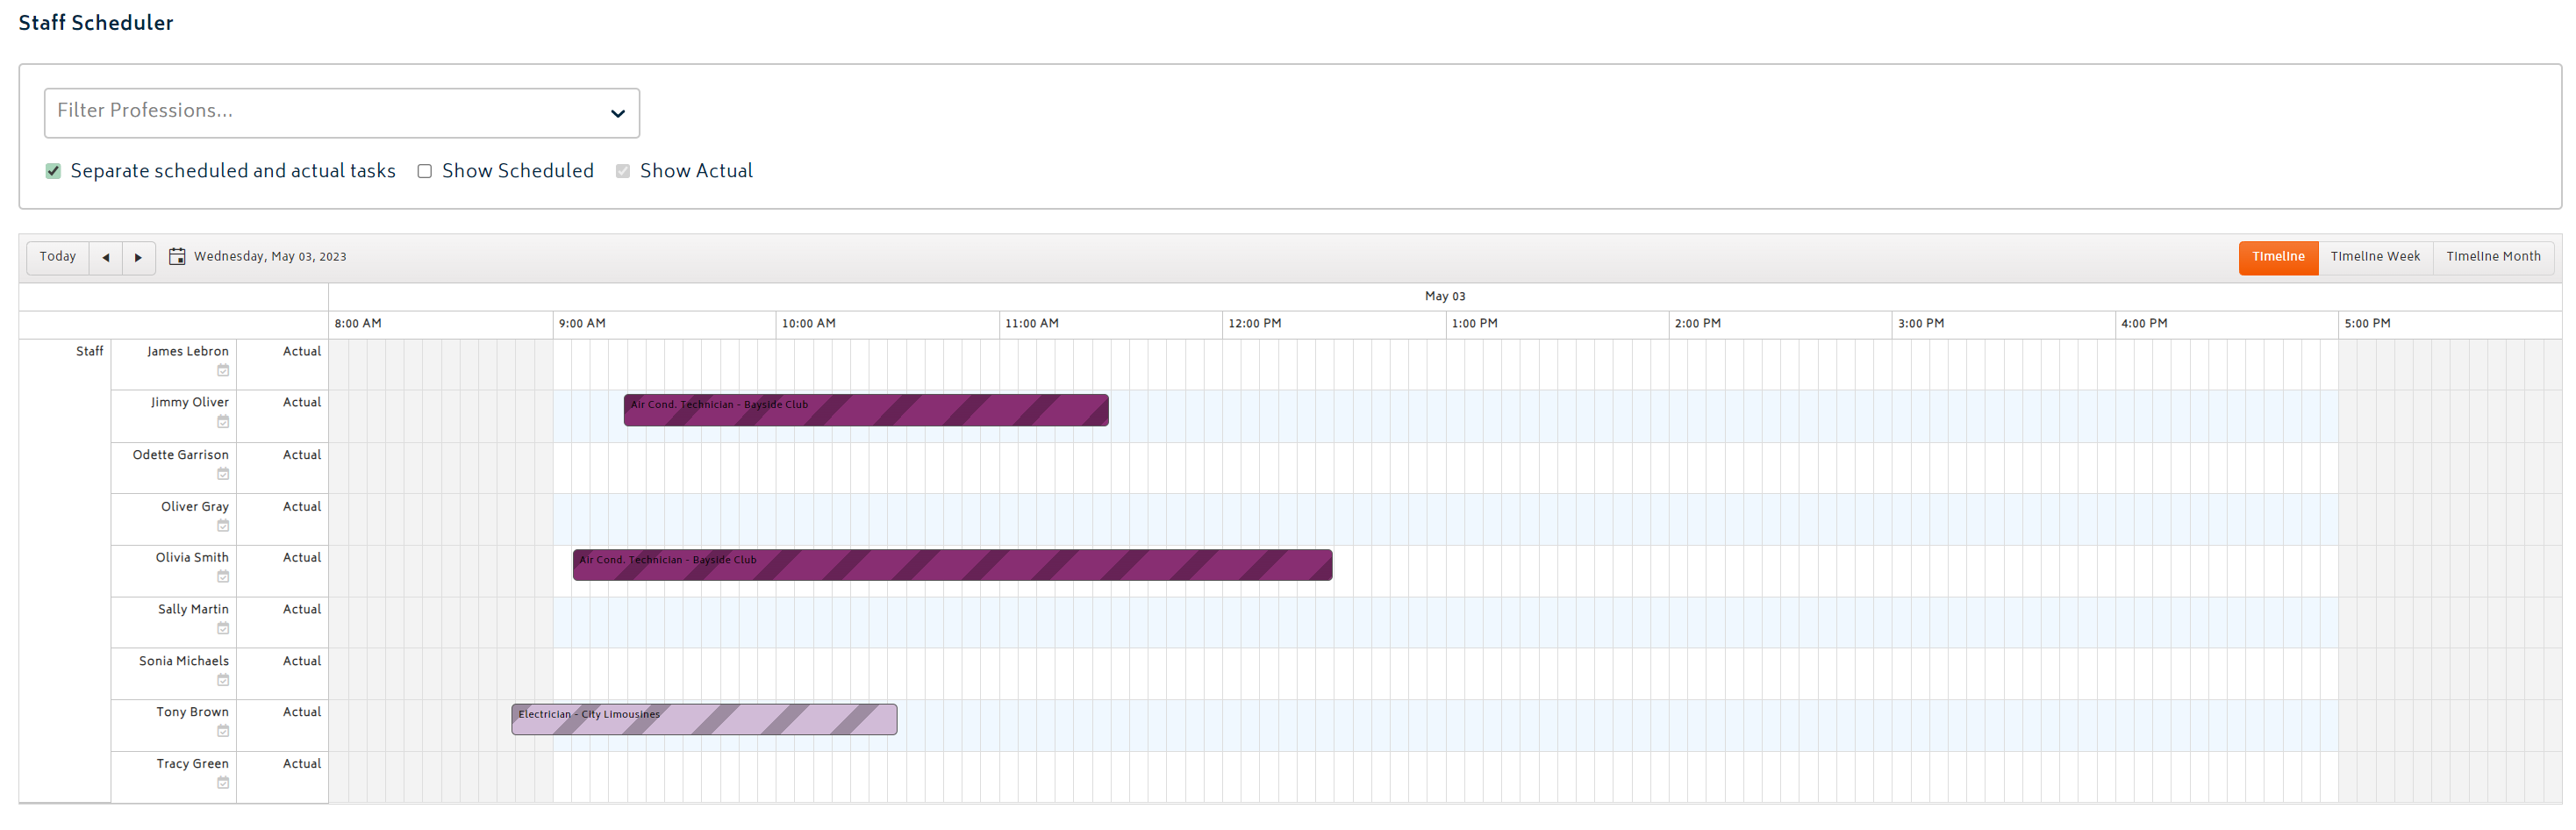
These are actual time records tracked or entered for a worker.
Dropping and Dragging Tasks
- Users can simply click, drag and drop tasks on this view from one worker to another.
- There is a requirement that the worker the task is being moved to has the same profession that is required for the task. If this requirement is not met, a warning will be provided and the task will go back to where it was dragged from:

Drag to extend/shorten tasks
- Hover the mouse over the edge of the task and a double ended arrow will appear
- Click and drag right or left to extend or shorten the task

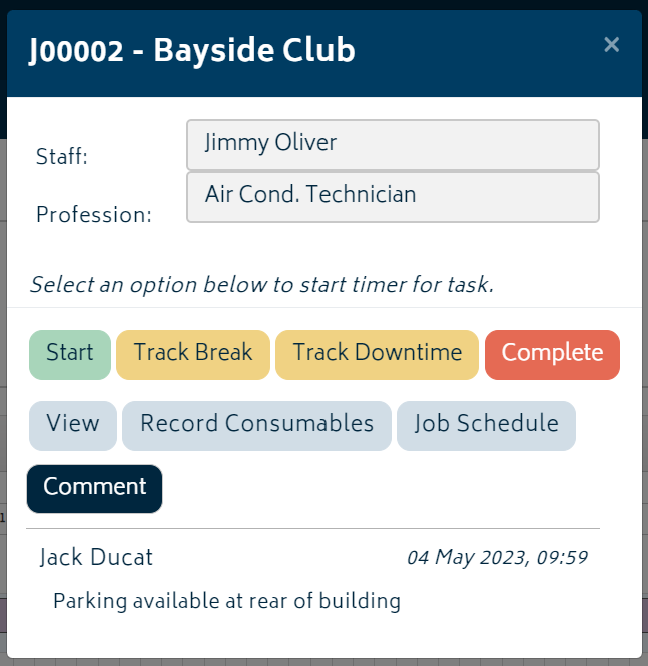
Click on task to bring up modal
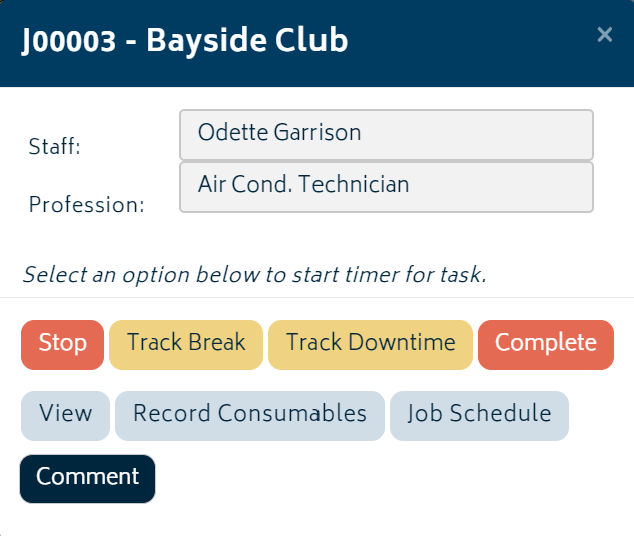
- Click on any task and a modal will be presented with a range of task options.
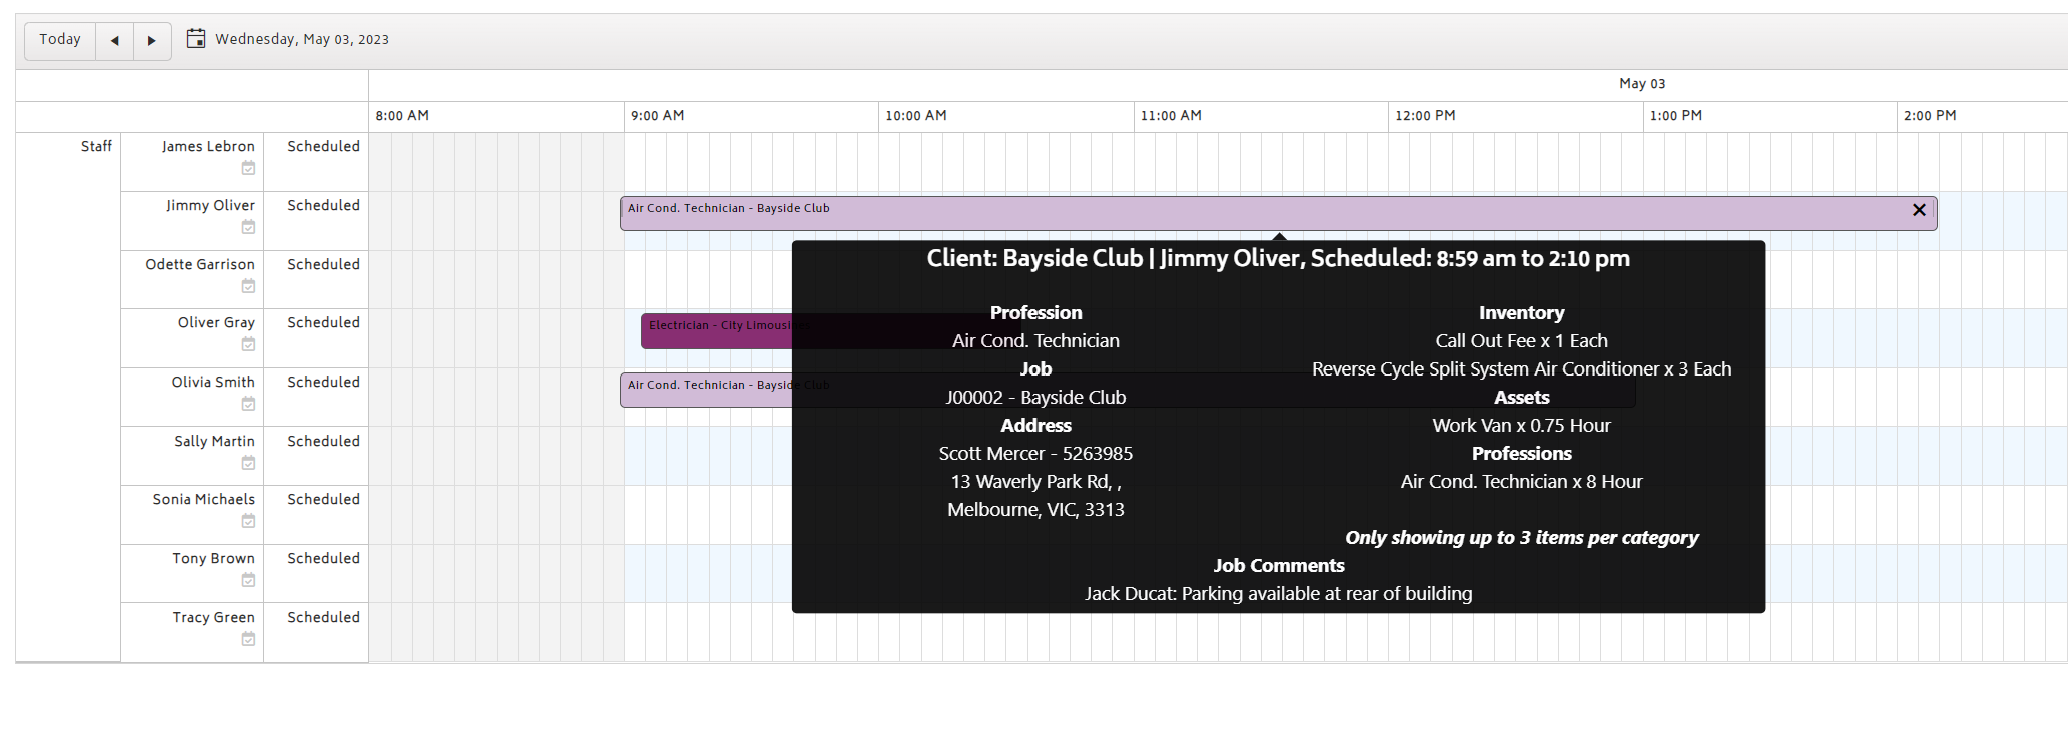
Hover over task for more information
- Hover your mouse over the task and a popup with more information on the task will be displayed:
Styling on the Staff Scheduler
In addition to the features on the Staff Scheduler page, there are also styles and formatting applied to help you quickly differentiate tasks and their status. These styles and formats are explained below.
Task colours, fills and borders:
All tasks for the same job will have the same colour on the scheduler
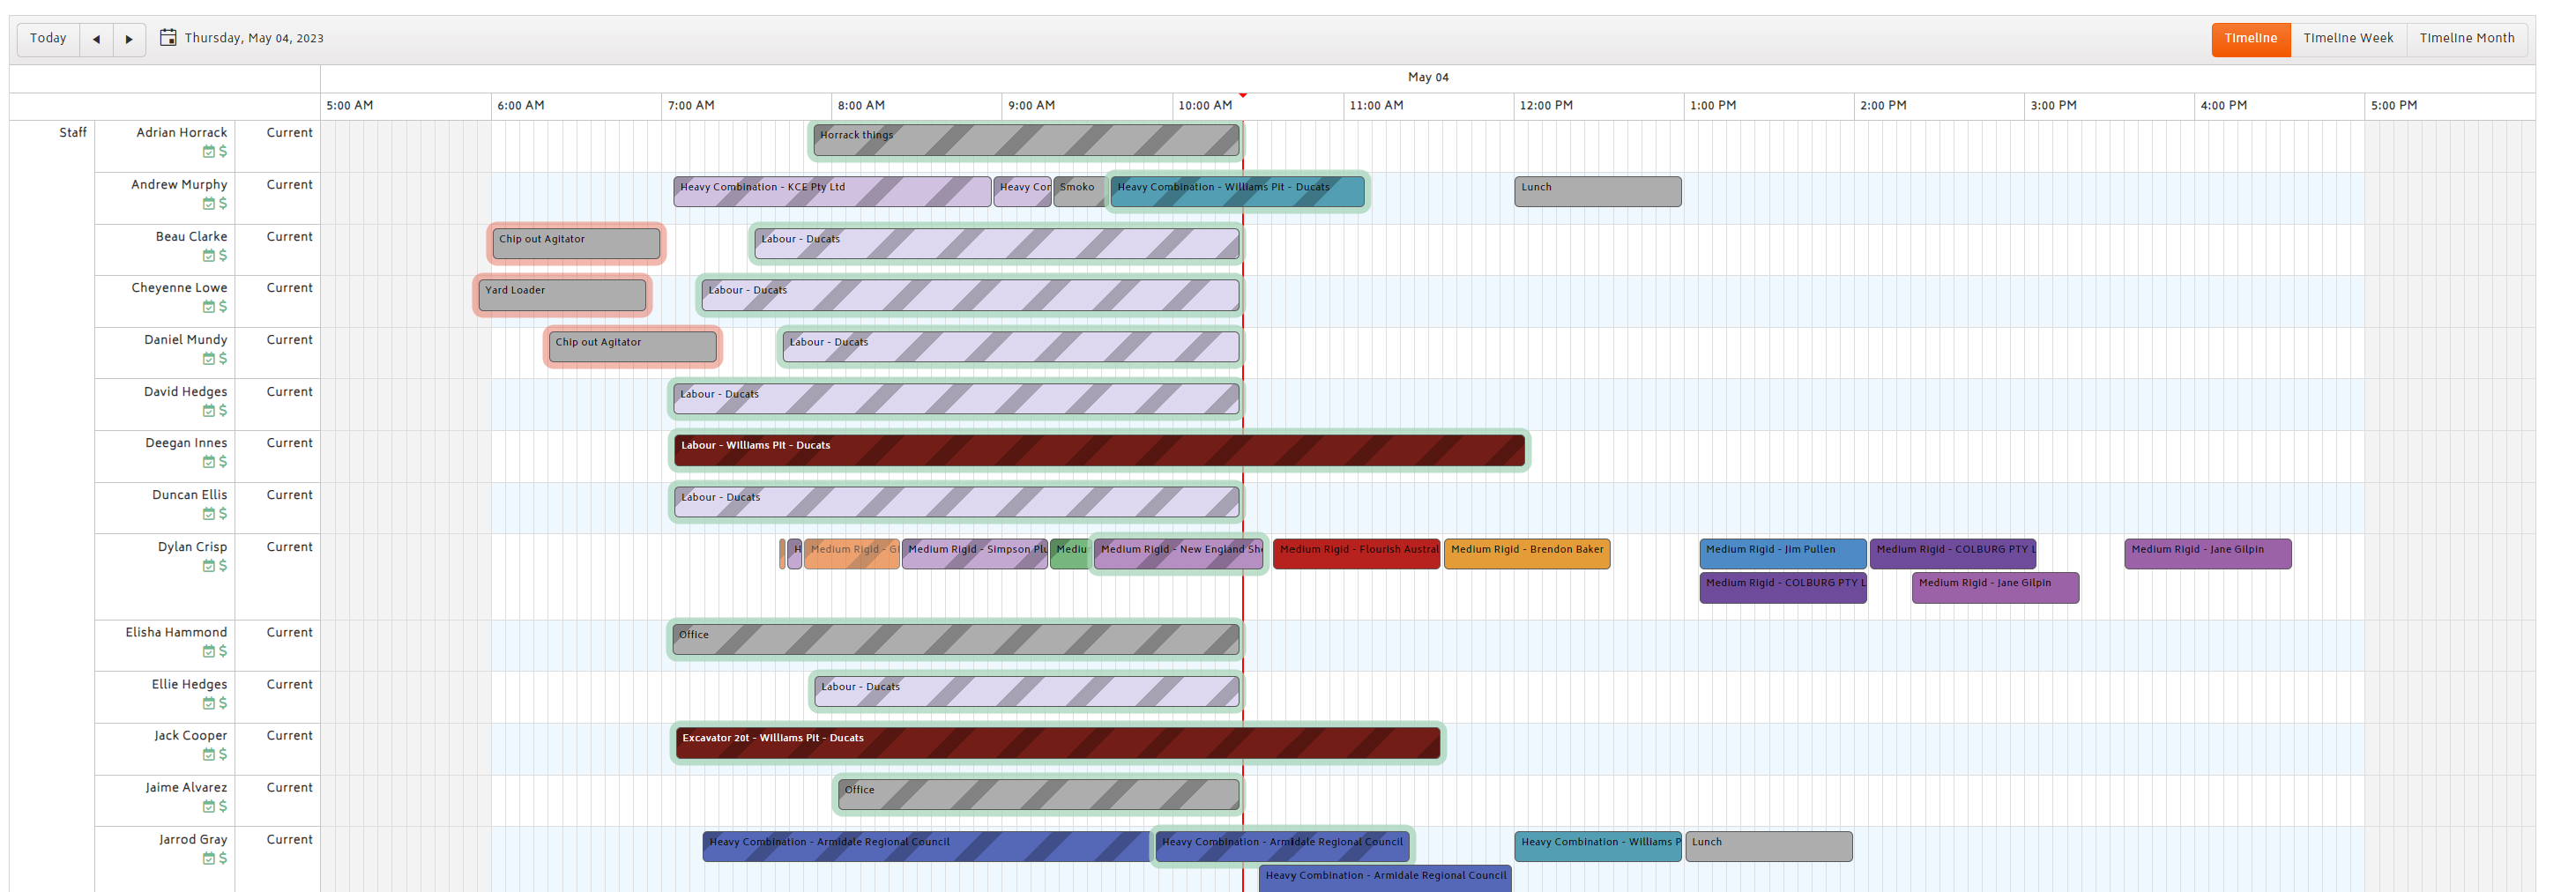
Tasks flashing green and with shading: These are Active jobs (i.e. a timer is running against them)
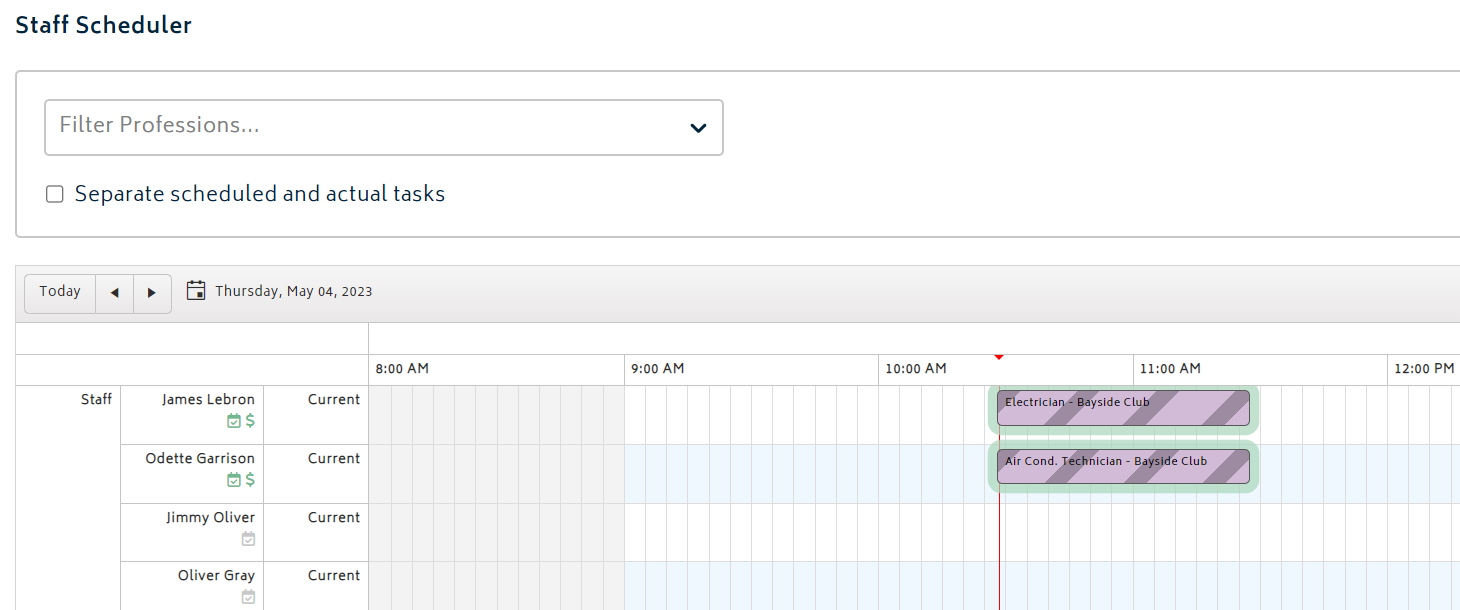
Task flashing red: Overdue (i.e. the task was scheduled to have already started, but it hasn’t started)
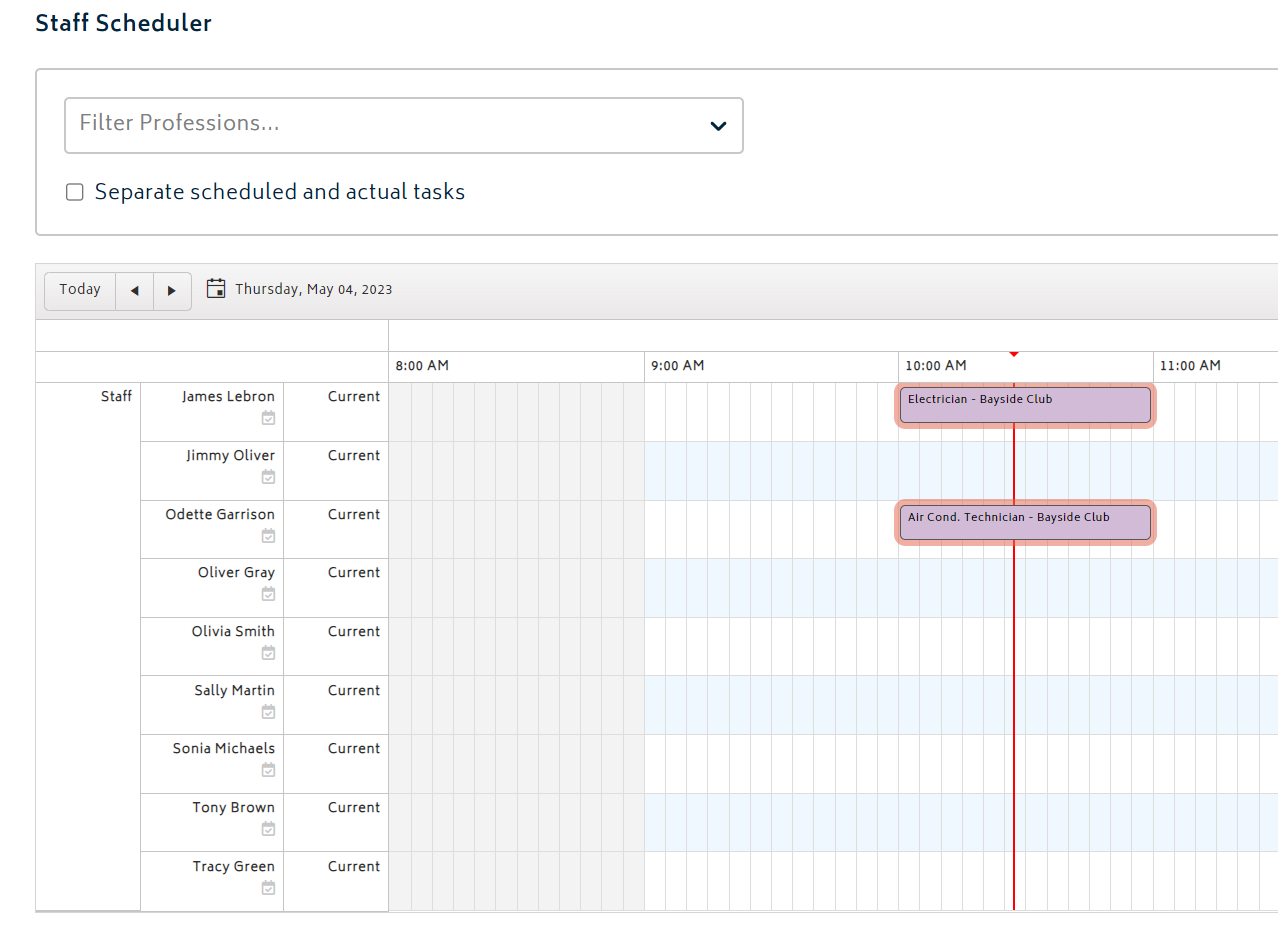
Task washed out and with shading (the task on row one in this image): Task has had time tracked against it and is marked as complete
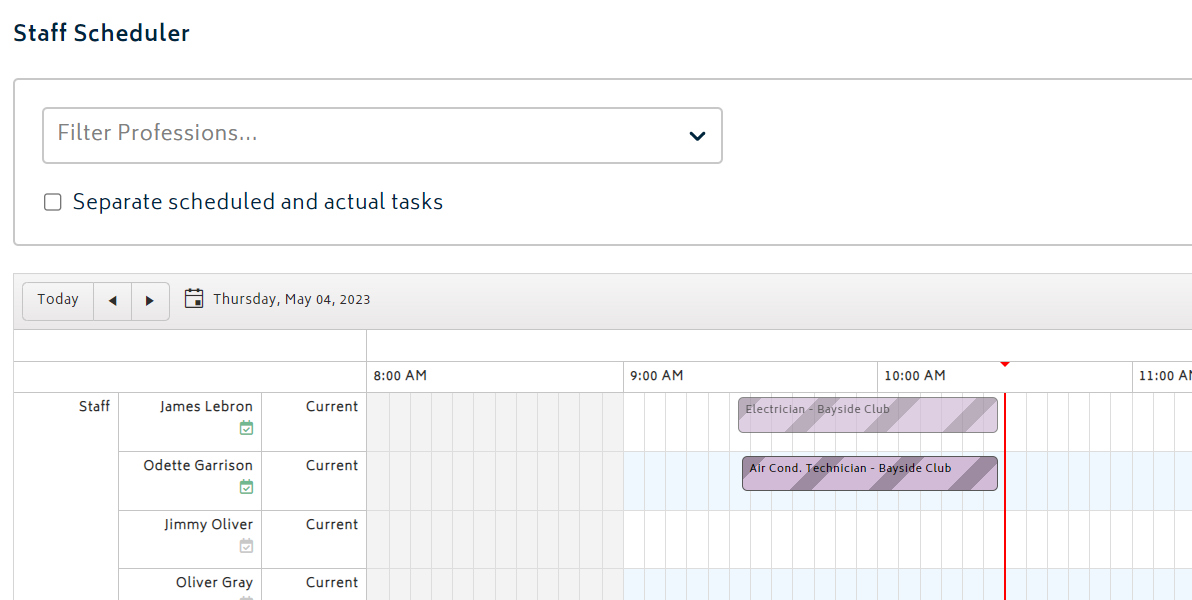
Task not washed out but with shading (the task on row two in this image): This indicates that the task has had time tracked against it, but its not marked as complete yet.
Billable task icon: $ Symbol
$ icon is green: The running timer is for a billable job:

To track a task as billable, simply select the “Start” option from the modal to start the timer for the task.

$ icon is red: The running timer is for a non-billable activity

To track a task as non-billable, select the “Track Downtime” option from the modal to start the timer for the task.
$ icon is grey: The running timer is assigned to a break time.

To track a task as break, select the “Track Break” option from the modal:
User started "Time Clock"
The Calendar Icon  is used to represent the status of the Time Clock on the Staff Scheduler page
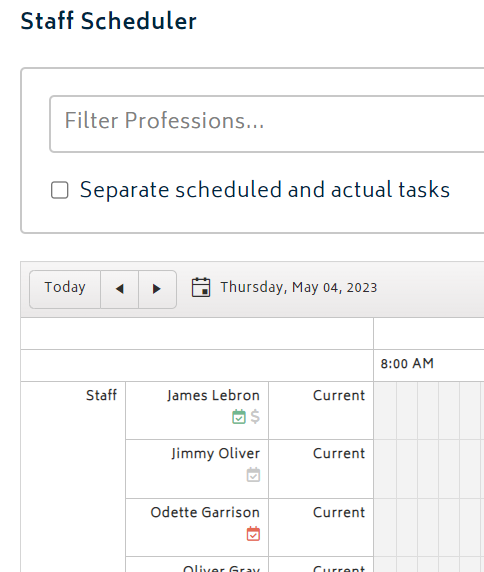
- Green Calendar Icon: User has started their time clock, or started a task for the day.
- Grey Calendar Icon: User has neither started their time clock, or any tasks for the day.
- Red Calendar Icon: User clock out for the day using the time clock.
Note: The Time Clock is used to record the time the worker enters and leaves the workplace for the day. Its also referred to as a Bundy Clock. The Time clock is separate to starting a timer against a task. For more information on the Time Clock refer to the Time Clock page.
Next: Time Tracking.