

Time Tracking
Introduction to time tracking in Gojee
Time tracking in Gojee is flexible and can be done either via real time capture of data using a timer, or by retrospectively recording hours against tasks. Time captured can be allocated to both the individual worker and the job they're working on. If you just need to record a quantity of hours worked and don't care about accurate time blocking, the Bulk Time Entry function can be used instead.
The recommended process is that each worker's times are reviewed periodically using the Daily Task Review page, and once these times are accurate, then the information for generating workers' timesheets and calculating the costs for jobs will also be accurate. This provides confidence when invoicing jobs, reviewing profitability, and simplifies the administration required to process payroll.
Prerequisites:
To track time for workers against jobs in Gojee the following are required:
- Profession(s) have been created. Refer to Professions on how to do this.
- Staff have been created and assigned one or more professions. Refer to Employees and Contractors for more information.
- The profession(s) have been added to the job BOM page. Refer to Create a Job on how this works.
To track time for workers against non-job tasks in Gojee the following are required:
- Staff have been created and assigned one or more professions.
In Gojee, there are three different types of "Activities" that time can be tracked against for a task. These include:
- General Time: time is billable to a customer, and is paid time for a worker.
- Break Time: time is not billable to a customer, and is not paid time for a worker (i.e. a lunch break).
- Downtime: time is not billable to a customer, but it is paid time for a worker (i.e. time spent with a truck breakdown for example).
Note: The names of these activities can be changed in the Settings section. If further variations on these are required for tracking specific costs or specific cost requirements for each task are required, the "Custom Activities" add-on can be enabled.
When starting a timer in Gojee, or retrospectively entering time for your workers, these three activity options are available. If the time is not customer billable, it will not be allocated to a job. If the time is not paid to a worker, it will show as unpaid time on their daily task review page.
Track staff's time against scheduled jobs
Once a staff member has a task scheduled for them, these users can navigate to My Work > Active Jobs page to see a list of all their scheduled tasks. There are two views on this page, one for the worker with the basic customer job staff role (refer to Employees and Contractors for more information), and the other for job manager roles.
Worker's View (job staff role):
Users with this role will only be able to see the tasks they have been assigned (and not see tasks that other users have been assigned):
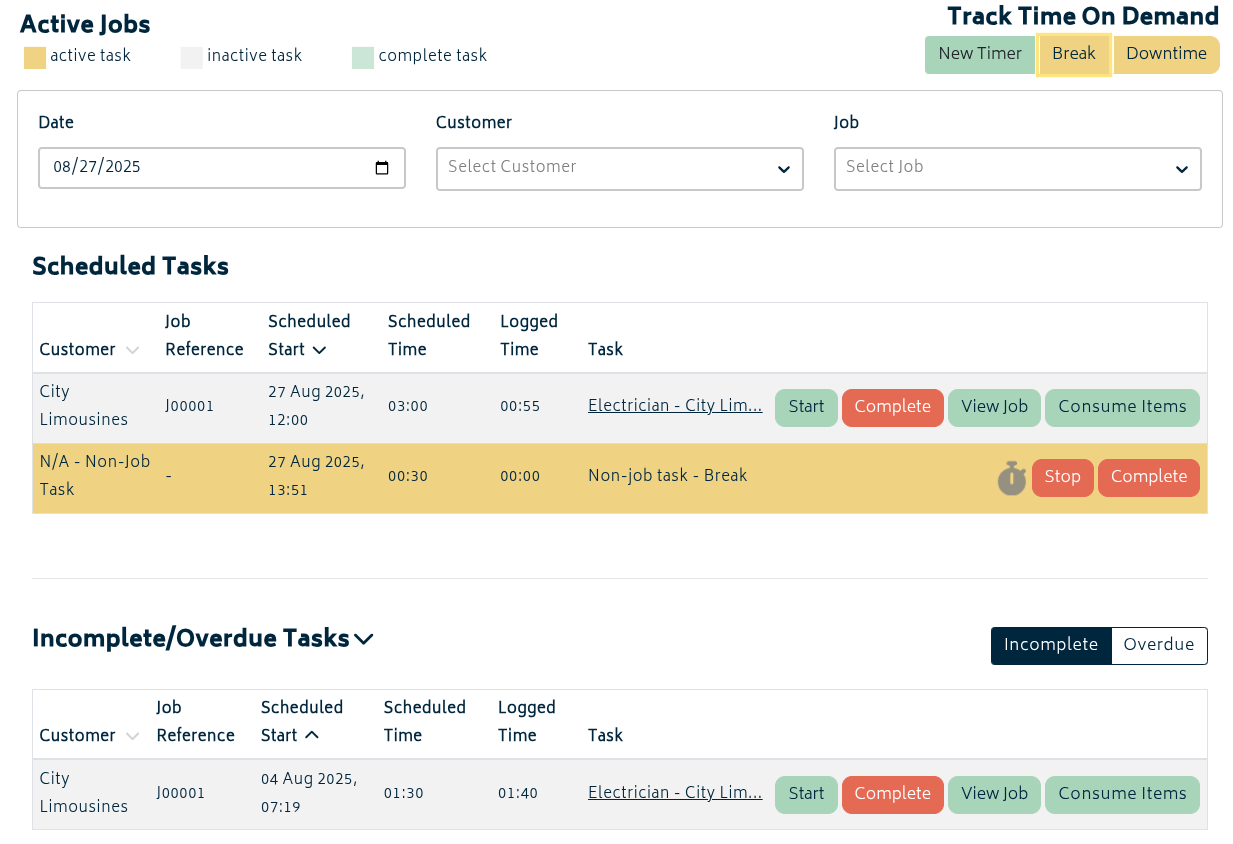
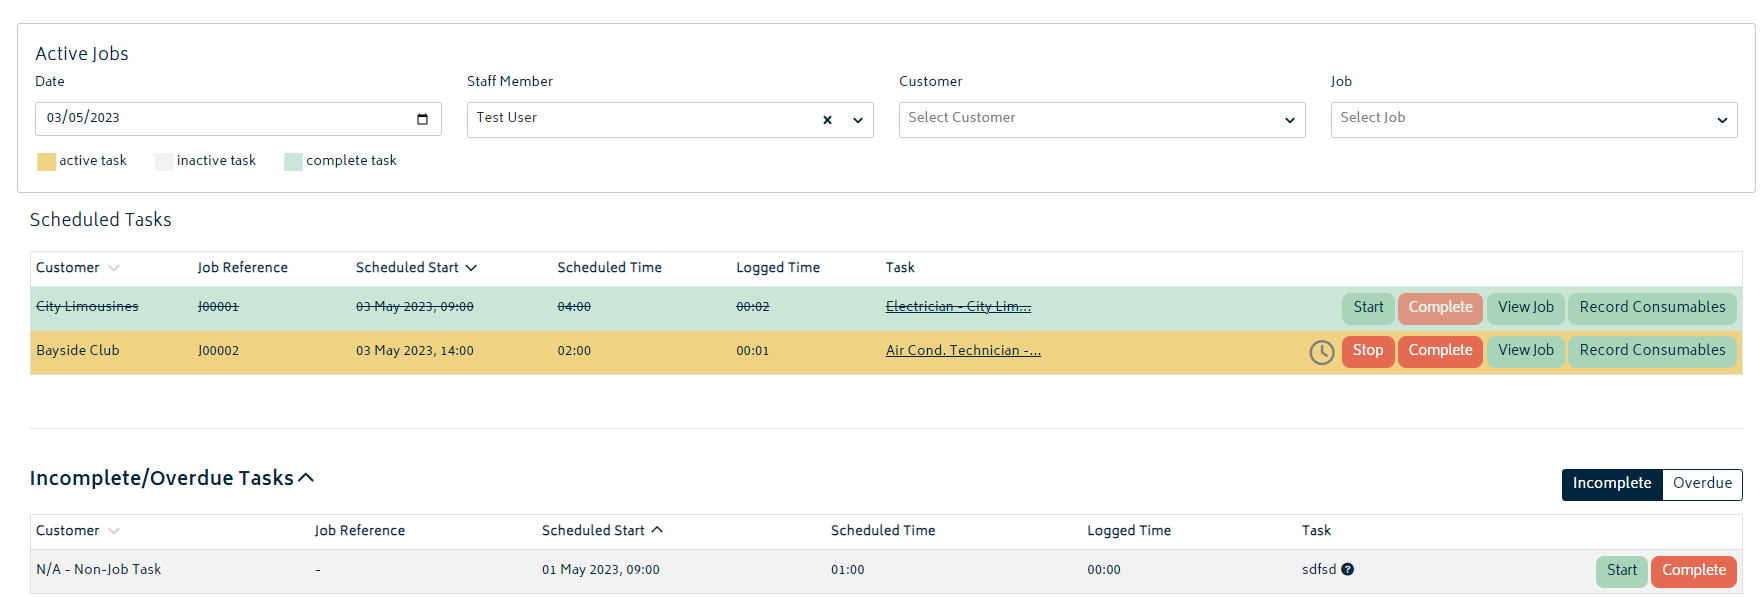
Users can see the tasks scheduled for the day selected as well as any overdue or incomplete tasks.
Note: Tasks that show in the incomplete/overdue task list are tasks from prior days that are yet to be marked as “Complete”. This is useful for tasks that workers didn’t get time to complete, or for tasks that run over multiple days. To remove the task from this list you can simply hit the Complete button. To differentiate between tasks that are incomplete (have been started but haven’t been completed) or Overdue (haven’t yet started) there is a filter on the right hand side of the page.
To start a timer for each task the user can simply hit the Start button for the task. The following image is what this screen looks like on a mobile device:
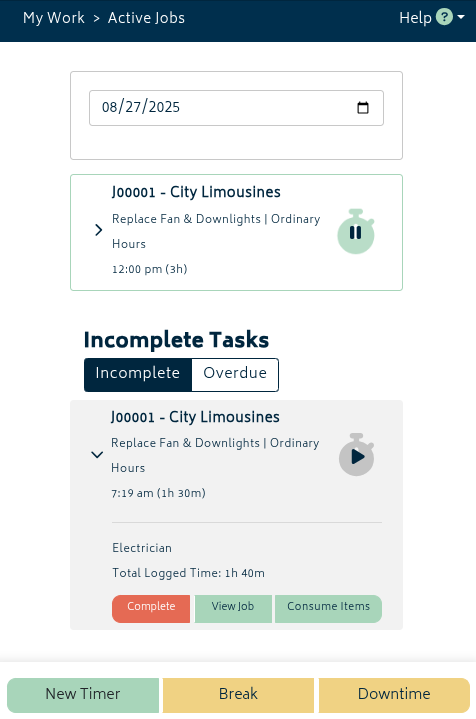
Note: For most scheduled tasks, they will be created as the activity "General Hours", meaning it will be client billable, and paid time for a worker. Refer to the note at the top of this page for more information.
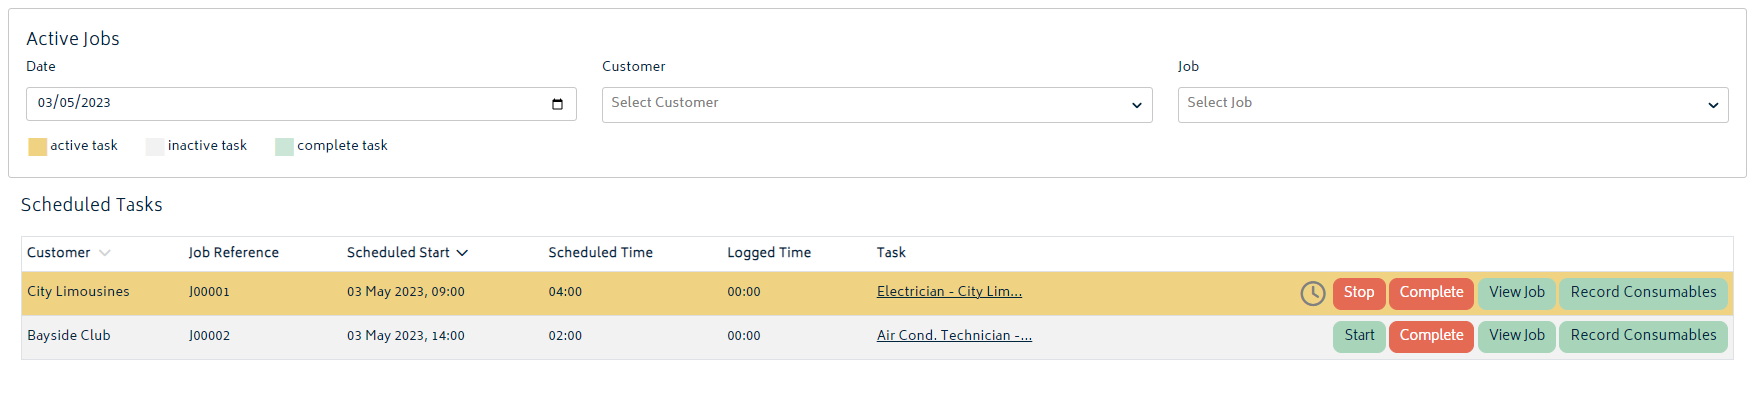
Once the timer is started, the task with a timer running will show in yellow:
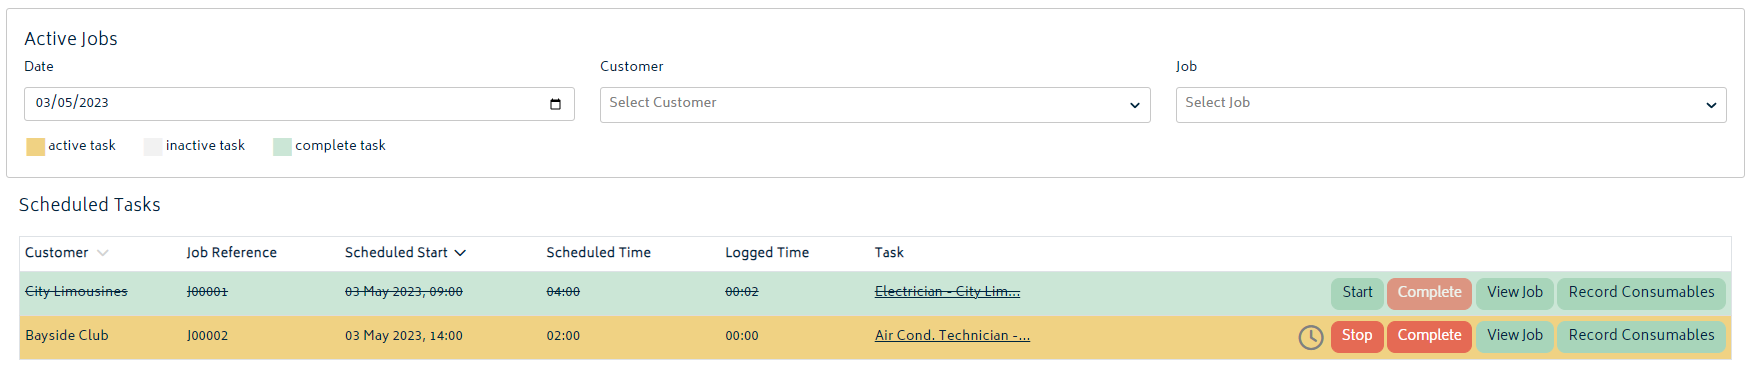
Once the task is done, the user can then either start the next task (which will stop the timer for the running task) or they can mark the task as complete (which will also stop the task) and then start the next task. Marking a job as complete will strikeout the task and highlight it green so the user can keep track of their active and completed tasks:
To start a timer against a "Downtime" or "Break" activity instead of "General" time, users can simply use the yellow buttons at the top right of the Active Jobs page:
Customer job staff and above have the ability to start timers on jobs on demand without specifically being scheduled - useful for more autonomous workplaces. Workers with the "Contractor" role will only be able to start breaks and downtime on their own, and cannot work without being assigned time to work on jobs via the scheduler.
Manager View (manager role):
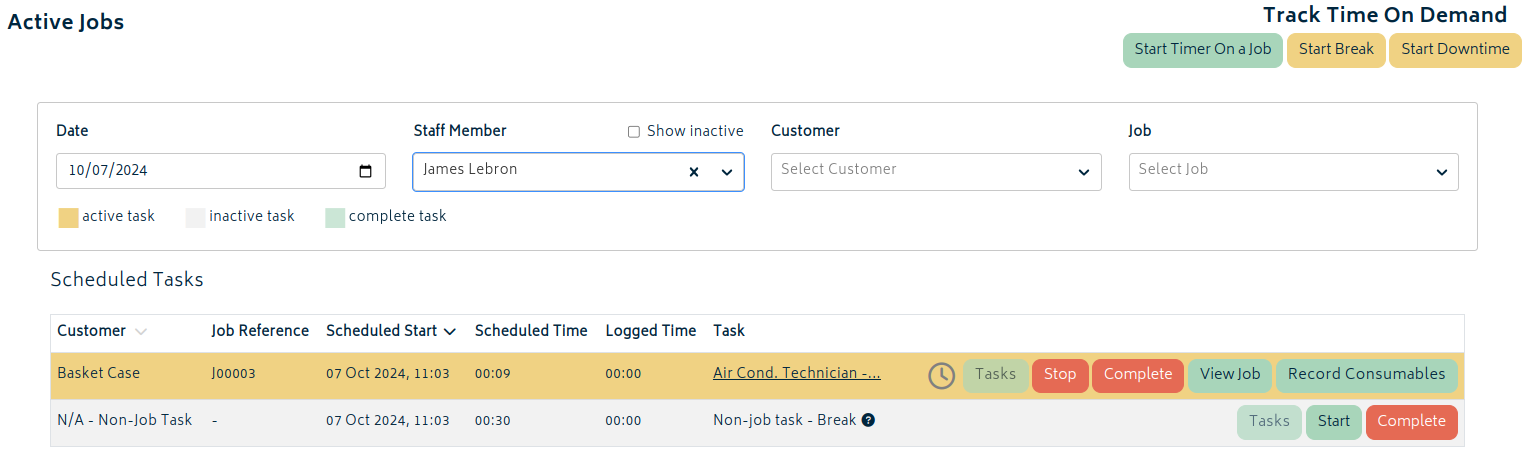
For users with Customer Job Manager or Administrator roles there is additional functionality displayed on the Active Jobs page. This includes an additional filter to choose the staff member so they can see scheduled tasks for all workers (and the ability to show inactive users so their historical tasks can be reviewed):
Users with role Customer Job Manager or above can also navigate to the Staff Scheduler page. This will show you all the scheduled tasks across all workers, and can be shown in a daily, weekly or monthly view:
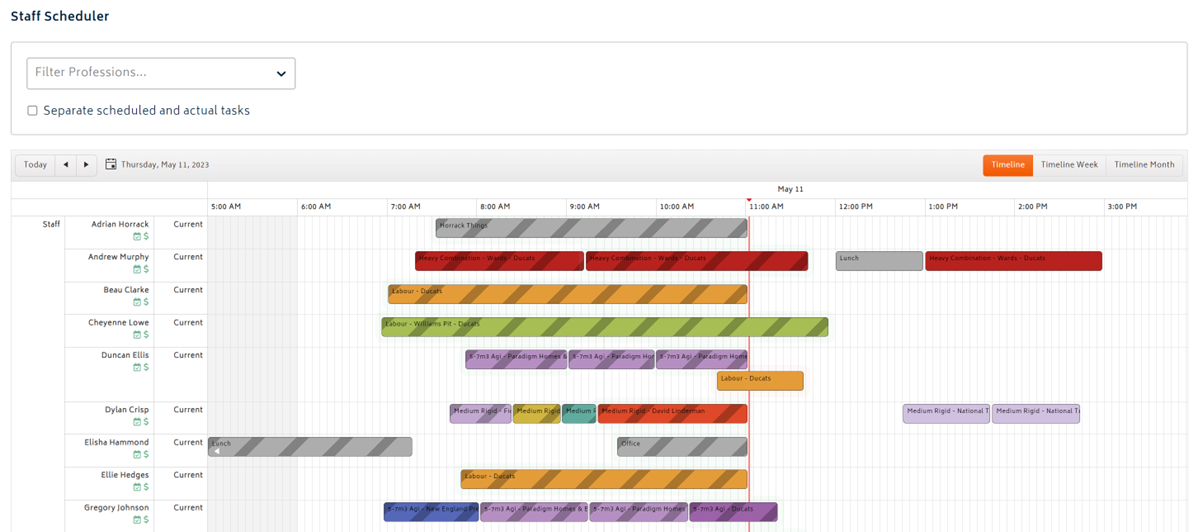
To start workers' timers from this schedule page, users can click on the individual task to bring up a modal which provides the option to start a timer, and also perform other functions such as viewing the job details, recording consumables etc. For more information on using the staff scheduler, refer to the Scheduling article.
Track workers' time without scheduling
Navigate to HR Management from the Dashboard, and then select the “Track Staff Time on Jobs” button.
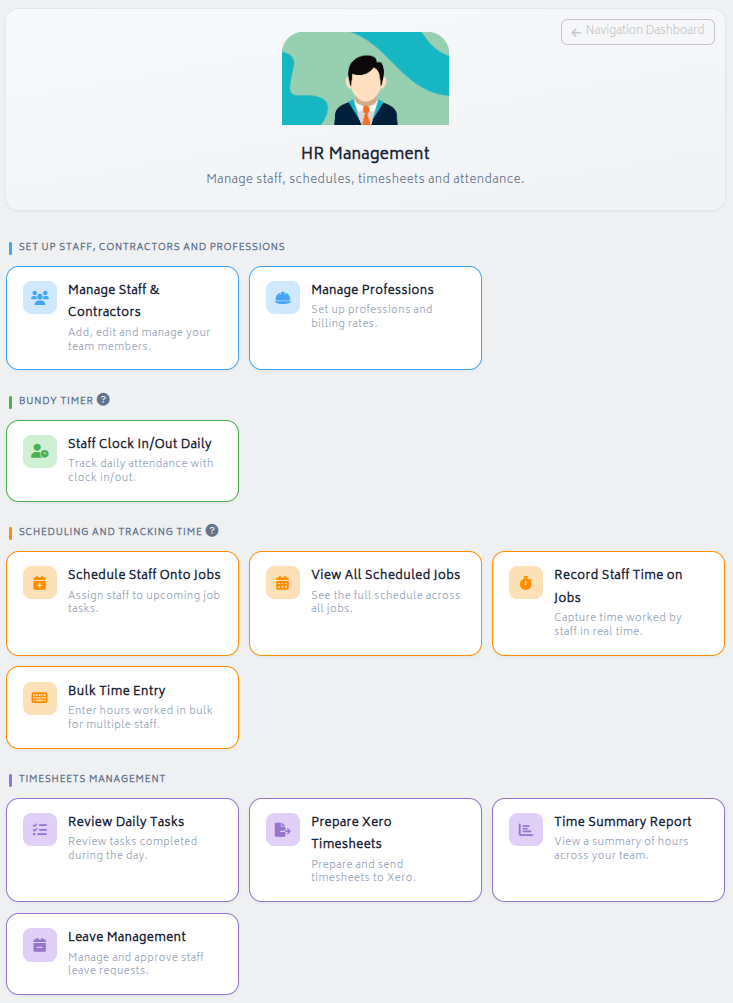
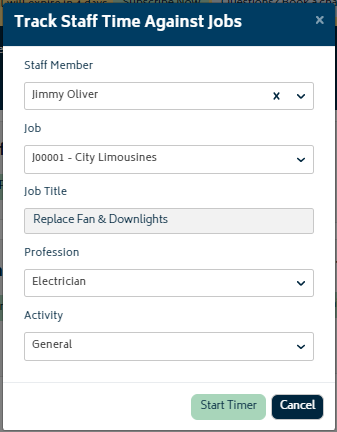
Use this button to track time against a job without a pre-scheduled task. You will be presented with the following modal where you can select the staff member, the job, the professions and the type of activity:
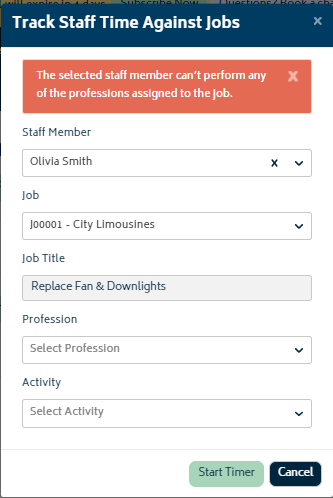
Note: only employees who have been assigned a profession which is required on the selected job will be able to track time against jobs using this process. If the worker cannot perform the task, the following error will be presented in the modal:
Editing tracked time for workers (Daily Task Review Page)
Note: Users with the role “Timesheet Manager”, or “Administrator” will be able to edit times tracked by themselves or other users. Users without this role will not be able to edit times, but they will be able to comment on the task, and/or their day as a whole, and leave a note for the manager as to what times need to be changed.
All edits to times in the system will have an audit log indicating the user that made the change, and the changes that were made.
To review and edit the times captured, or create new time entries for a worker, navigate to the Daily Task Review Page, select the date and the worker to get started.
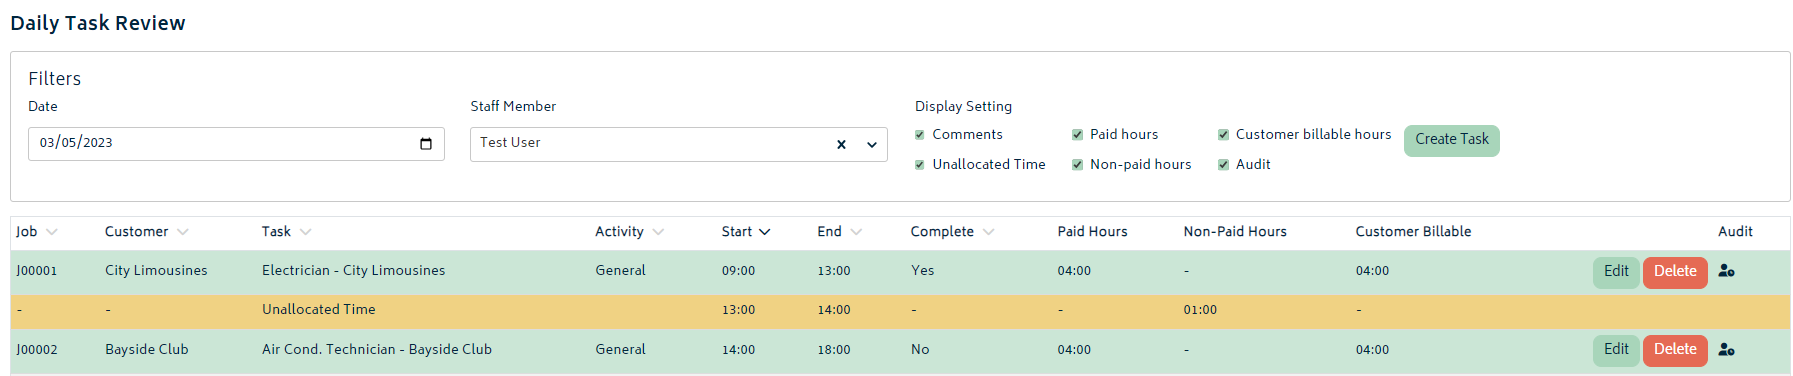
- Click on the Edit button on any task record and you will be presented with a modal to comment on the task, or make changes to the records:
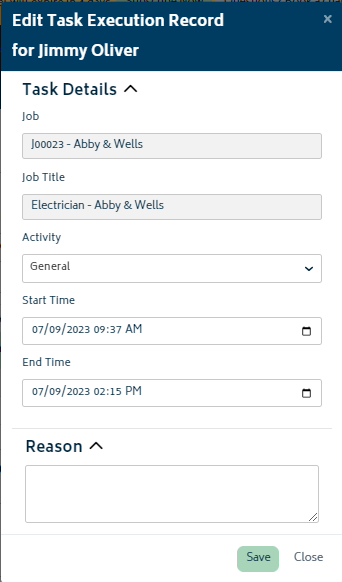
- Click Save and your changes will be updated in the system.
If a change to the times has been made, an icon will appear in the Audit column as shown in the image above. You can hover over this to see the audit log.
The Display Settings at the top of the page enable you to show or hide information from the page.
Retrospectively record tasks for workers
If you are entering a single entry for a single employee, typically this is done via the Daily Task Review page.
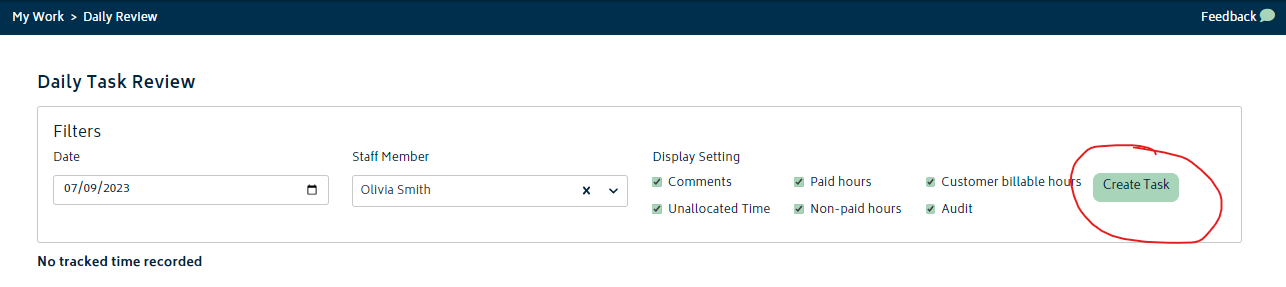
Navigate to the Daily Task Review page, select the employee and the day you want to work on, and then hit the green “Create Task” button at the top right of the page.
-
- Complete the information in the modal provided. You have the option to add a time record for an existing job, or for a non-job task. The modal includes fields for job, profession, activity, start time, end time, and duration. Hit the Create button once you've entered the information:
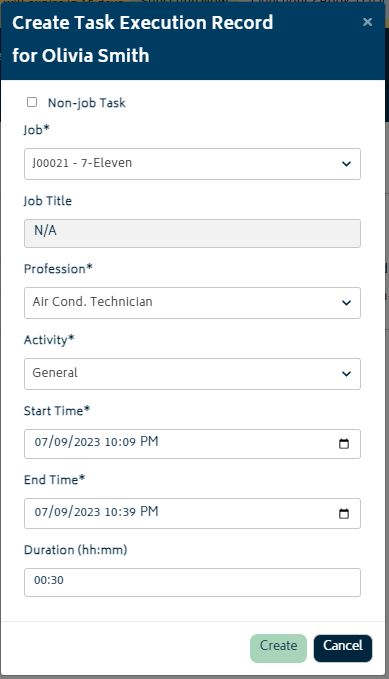
- For job-related entries, once you choose the profession task, Gojee will pre-fill the start and end times using the day currently selected on the page. The end time defaults to the current time for that day, and the start time defaults to 30 minutes earlier.
- If you change the duration, Gojee will recalculate the end time automatically.
After creating the entry, a single time entry will be logged in the system. This entry will be shown on both jobs and workers' timesheets. Note that bulk time entry and bulk logged work also exist as valid methods for entry - if you need to record time for multiple staff at once or multiple days at once, those can be used as alternative methods to record time.
Next: Time Clock.