

Setting Up Staff and Gojee Users
Introduction
Employees and contractors are referred to in the Knowledge Base collectively as staff. By giving access roles to your staff, you can set them up as Gojee users.
If you use Xero for payroll (Australia only), all registered employees in your Xero file with a valid email address set in Xero will be imported into Gojee automatically. Only staff members registered via Xero will have their timesheets able to be sent via Gojee's timesheet management into Xero.
Staff can also be registered into Gojee directly - these staff can still have time recorded against them (or record time themselves), but they will not have timesheets enabled. If you use Gojee staff, you can use the Time Summary report to export the employees' hourly data into a CSV form.
View Staff
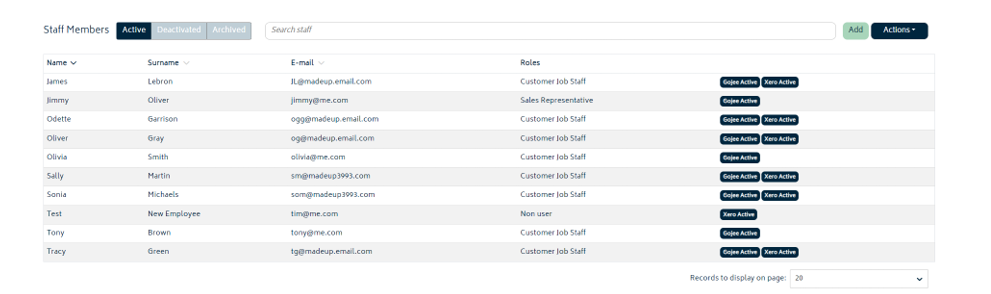
To view staff in Gojee, from the Navigation Dashboard you can either navigate to Time and Staff and select the option Manage Staff & Contractors, or access Resources > Staff from the menu bar.
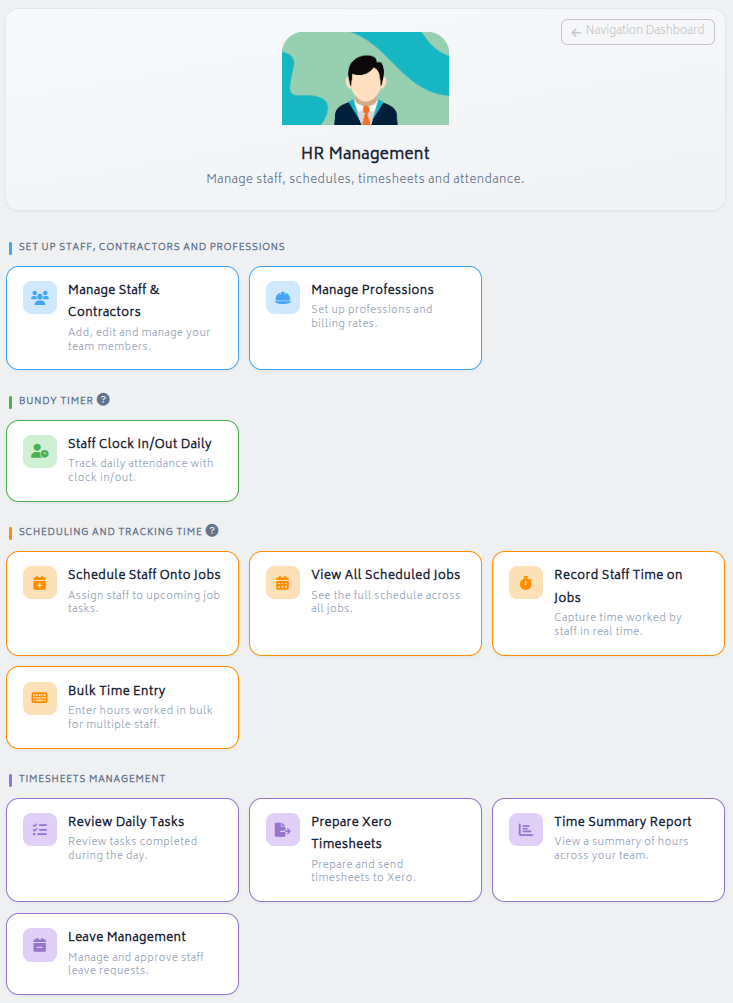
Either option will take you to the Staff List.
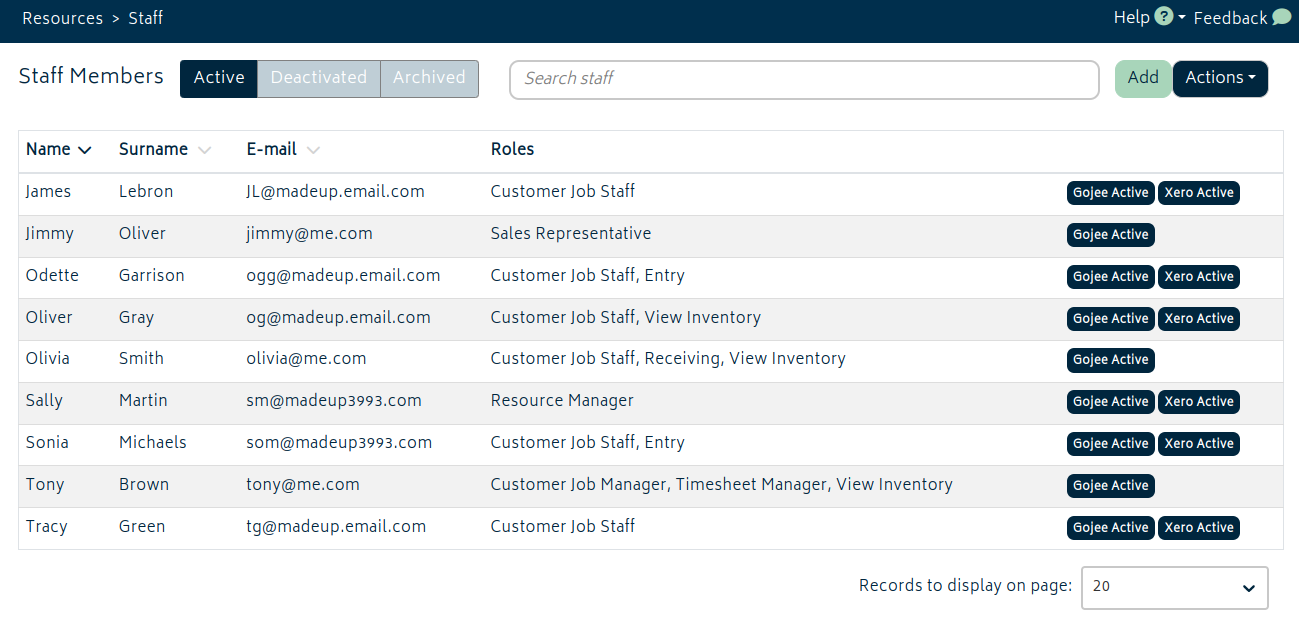
Clicking on any row will allow you to view details of and edit the staff member. Refer below for details on what the fields are and how to edit them.
Add Staff from Xero
To add an employee into the system from Xero, follow these steps:
- Navigate to the Employee section from the Payroll menu in your Xero file
- Click on the green New Employee button and select Add Employee
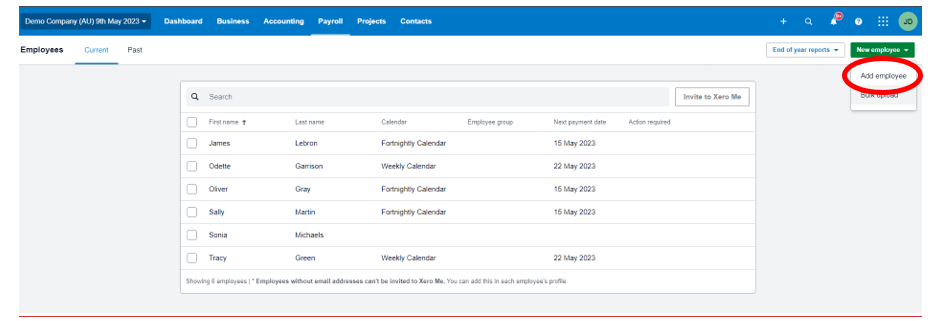
- Complete all the required fields and ensure you add an email address for the employee
- Go to your My Accounts page in Gojee from the top right dropdown
- Select Sync Now > All
- Go to HR Management, then Manage Staff and Contractors. You’ll be presented with the Staff page showing all of your workers.
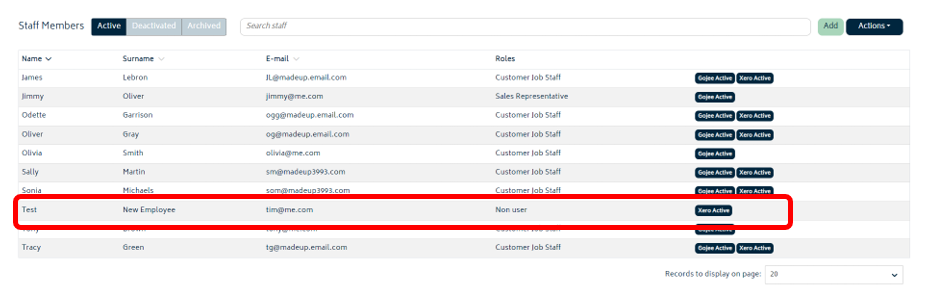
Your staff member will now show in the list as imported into the staff page with a Xero Active status label.
Add/Edit Staff
To add a staff member directly into your Gojee file, go to the staff list. Click the Add button to enter the staff member's data, or click Actions > Import/Update from CSV. If editing existing staff, the following details will be much the same.
You will be presented with the Staff Details screen.
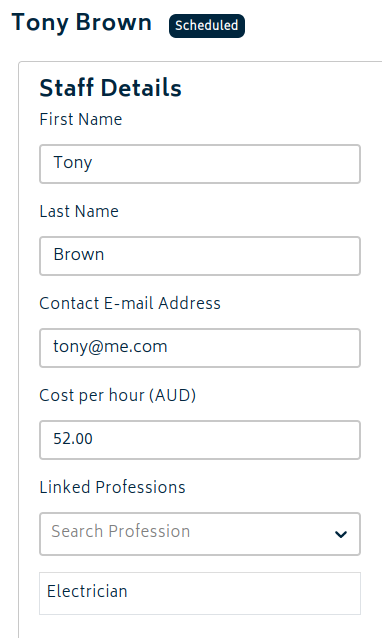
- First and Last Name (*Required fields): Enter the name of the staff member. These fields will not show for editing purposes if the staff comes from Xero.
- Email (*Required field): Enter the email of the staff member. If the staff comes from Xero, this field will be locked and update on sync.
- Cost per hour (*Required field): Enter the cost per hour of the staff member. This field is used when this worker records time in the system to calculate the cost of the time spent. It's recommended that this cost includes all relevant overheads (i.e. super, allowances etc) unless these are added as costs on the jobs separately.
- Linked Professions: Select one or more Professions from the list. This creates the relationship between the worker and the tasks they can perform.
Note: You will need to have first set up Professions in your Gojee file to be able to select them from this list. If you haven’t yet created them you can save the new worker and come back and add it later. Refer to the Add Professions section for more information.
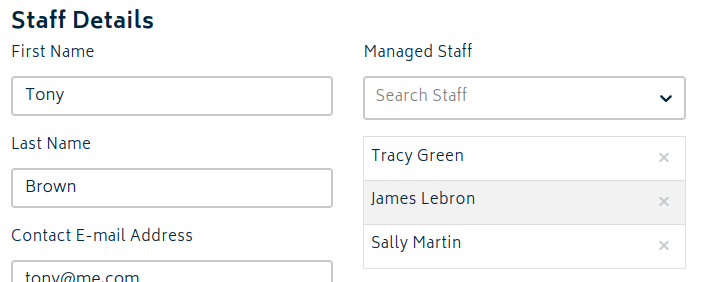
- Managed Staff: If the staff has the user role "Timesheet Manager", this secondary area will appear. You can assign the names of people that this staff member is to oversee. Staff chosen this way will be visible by default for this user on the Timesheets page.
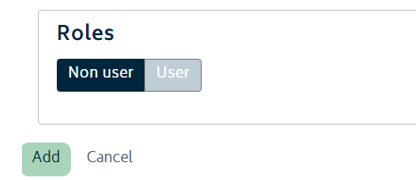
- Roles: This is where you can choose if this worker will have access to the Gojee system, and in what capacity they can use the system. This is detailed in the following section. It isn't required for staff in the system to be users - if you change your mind, you can come back and assign the role later.
Assign Roles for Staff
To add a role for staff, simply click on the person from the list on the Manage Staff and Contractors page and then click on the User tab and the following information will be displayed:
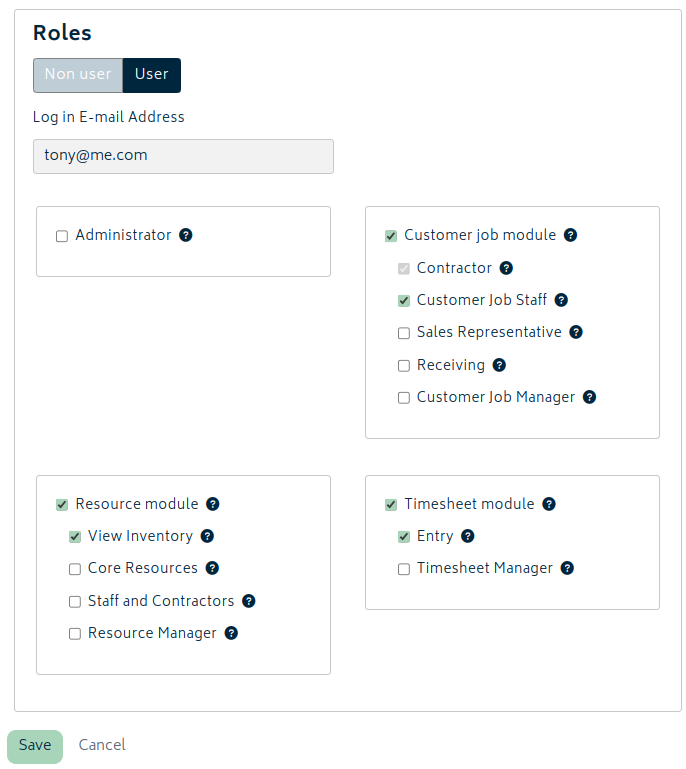
- Login Email Address (*Required field): This will default to the email entered in the field at the top of the page. By default, it will be prefilled with the contact email for the staff. You will be able to edit this prior to saving the staff as a Gojee user. Once the role is created, this will be the email address the worker will use to login to Gojee.
Note: Once a staff is saved with a role, they will become a user. From the moment the save occurs, the email address to login to Gojee cannot be edited, so please ensure it is correct. For Xero employees, this will default to the email address for the employee in the Xero file. As such, it can possibly be the worker's personal address if not changed.
It may be wise to consider the best email address for the user to use to login to Gojee and double check it prior to saving.
Role groups:
There are three main role groups and an administrator role. The Administrator role can do all functions in the system, the other roles can combine to enable users to do a range of different functions in the system.
-
Customer Job Module:
- Contractor: Enable user to execute customer jobs already set up and assigned to them, as well as being able to track their own time.
- Customer Job Staff: Enable user to execute customer jobs already set up and assigned to them, track their own time and start timers on any jobs they have the correct profession for, as well as record consumables used on jobs.
- Sales Representative: Enable user to manage customer jobs and view assets, clients, inventories, products and professions.
- Receiving: Enable user to view purchase orders and create goods receipts.
- Customer Job Manager: Enable user to view the job profit and manage customer products.
-
Resource module: Roles relating to creation and editing of resources including Staff, Inventory, Assets Etc.
- View Inventory: Enable user to view inventory.
- Core Resources: Enable user to manage assets, inventory, profession, customers and suppliers.
- Staff and Contractors: Enable users to create, view and edit staff including access to sensitive payroll information.
- Resource Manager: Enable user to manage assets, inventory, profession, staff, customers and suppliers.
-
Timesheet Module
- Entry: Enable user to record their own times via Bulk Time Entry.
- Timesheet Manager: Enable user to review timesheets and post to Xero.
Note: Roles can be combined, so for example a worker could be assigned the View Inventory and Sales Representative role at the same time.
Assigning Earning Rates
For staff connected to Xero, at the bottom of the page you will find a simple Earning Rate Allocation Rules section. This is used when sending the employee's timesheet to Xero to allocate the hours used each day to the correct pay categories.
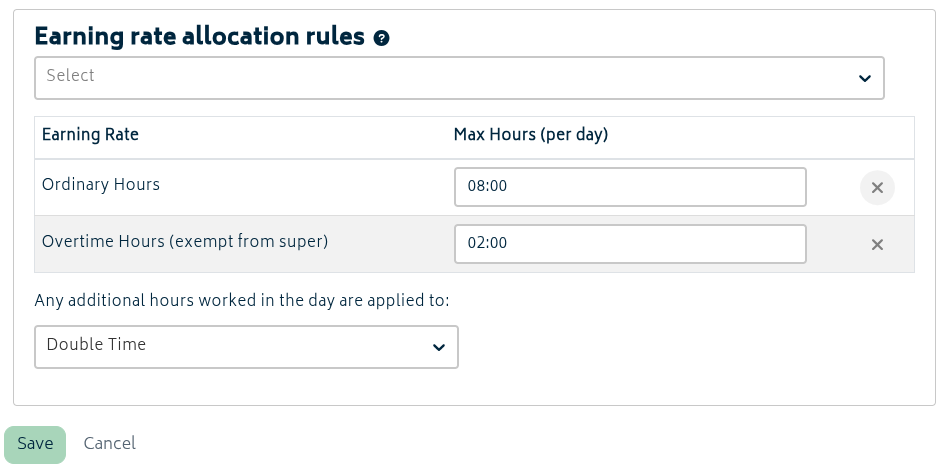
In the above example, if a staff clocks 8 or less hours a day towards billable hours (via real-time recording or bulk time entry) then all of the hours will be recorded in Xero as ordinary hours. If the employee goes over this amount, any time from hours 8-10 will be sent to Xero as overtime hours (with a 1.5x rate applicable in Xero). Time beyond that will be recorded as double time, also set up as overtime hours but at a 2x rate.
For example: The staff member works 13 hours and 45 minutes in a single day.
- 8 hours will be noted as regular hours
- 2 hours will be noted as 1.5x overtime
- 3.75 hours will be noted as 2x overtime
The above amount of hours will be sent to Xero when the staff member's time worked is pulled into their timesheet.
Note: As this is a simplified method for ensuring correct wages, hours recorded this way are only for processing in Xero. Costs associated with jobs in Gojee will not reflect these different pay structures and will instead use the base rate. If you need accurate costing, please refer to the Add-Ons section to enable Custom Activities or Advanced Payroll.
Importing Data
Importing from CSV files
This process should be used when you’d like to import a bulk list of contractors, or if you’d like to make bulk changes to contractors previously imported into Gojee.
The import process uses the email address to assess whether the contractor is new, or already exists. Hence, changes to email addresses cannot be made in bulk, but all other asset fields can be updated.
To start an import, navigate to HR Management and Manage Staff and Contractors. Click on the Actions button at the top right of the page and select Import/Update from CSV. You will be presented with the following modal:

Exporting Data
This process will export all your active staff and contractors to a CSV file, along with their emails, cost per hour, and roles in Gojee.
To run the export, navigate to HR Management and Manage Staff and Contractors. Click on the Actions button at the top right of the page and select Export to CSV. A CSV file will be generated and automatically downloaded - please check the download section of your browser.
Next: Professions.